Slow Cooker Pulled Pork

This is an awesome pulled pork recipe! I used 1 1/2 Tbsp. kosher salt, which was a bit less than the original recipe I was following. I was also using a 5.2 lb pork instead of 5 lb The end product was delicious and we are still enjoying the leftovers, but if I make it again I will probably lower the salt a little more. Probably to 1 Tbsp. kosher salt (so that’s what I’m going to type below).

Slow Cooker Pulled Pork Recipe

Ingredients:

  • 5.2 lb. pork shoulder (skinless, bone-in)
  • 1 Tbsp. kosher salt
  • 1 tsp. ground black pepper
  • 2 tsp. Cumin
  • 1 Tbsp. Oregano
  • 1 Tbsp. light olive oil
  • 4 cloves garlic, minced
  • 1 yellow onion, chopped
  • juice of 3 oranges (or 2 oranges and 1 lemon) – about 3/4 or 1 C. of juice total

Instructions:

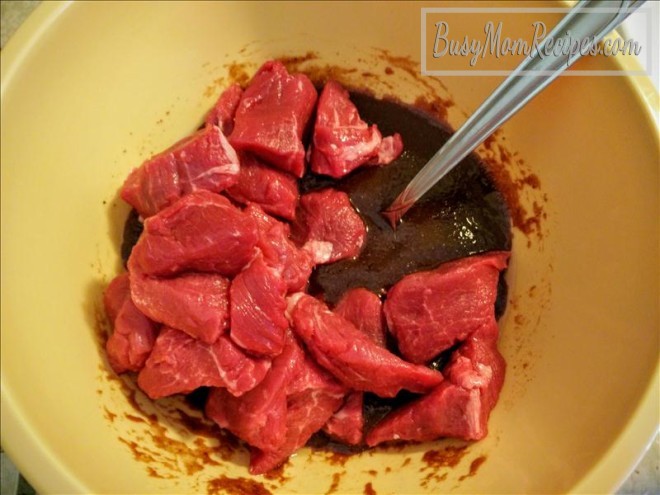
  1. In a small bowl, combine kosher salt, black pepper, cumin, oregano and olive oil. Set aside.
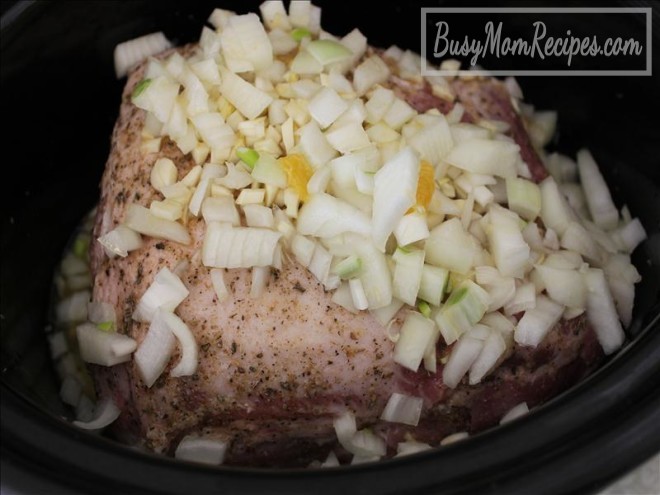
  2. Rinse the pork shoulder and pat dry with paper towels. Place fat-side-up in slow cooker.
  3. Rub the combined seasonings all over the pork. Top with onions, garlic and then pour the orange juice over the top. Cover and cook on high for about 7 hours. pork shoulder in slow cooker
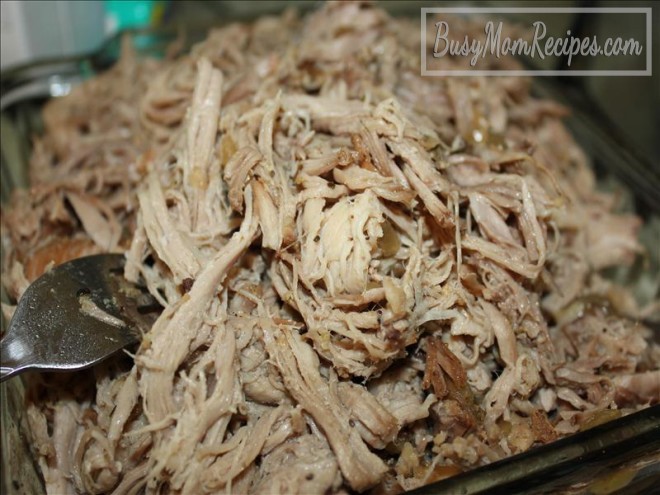
  4. Remove pork from slow cooker. It should be so tender that the meat will be falling off the bone when you try to move it. I put the meat in a glass baking dish since it was still so hot. With two forks, gently shred the pork. You can remove the fatty pieces if desired. Add however much liquid and onions from the slow cooker to the pulled pork as you’d like to make it juicier. Probably at least a few spoonfuls.

pulled pork in the crock pot

Enjoy your pulled pork (carnitas) with MASHED BEANS in a burrito, quesadilla, nachos or salad. This makes quite a bit, so if you’re not feeding a crowd, freeze the leftovers in smaller portions in freezer baggies!

*Inspired by THIS recipe.

White Chicken Enchiladas with Flour Tortillas

I’ve posted a couple different chicken enchiladas on Busy Mom Recipes. GREEN CHILE ENCHILADAS (EASY) is simple and uses Greek yogurt instead of sour cream. This recipe also calls for green chile enchilada sauce instead of diced green chiles.

LIGHT AND CREAMY CHICKEN ENCHILADAS RECIPE (FROM BETTY CROCKER) is a delicious recipe and a great way to use up a can of Cream of Chicken Soup if you have one on hand.

Even though I thoroughly enjoyed those two recipes (even enough to post them online), I tried this new recipe and loved it as well! It was easy and very cheesy! The sauce really turned out perfect too and the cilantro on top just topped it off, literally 🙂

White Chicken Enchiladas with Flour Tortillas

Ingredients (makes 10 enchiladas):

  • 10 soft taco-sized flour tortillas
  • 2 C. shredded cooked chicken (I used rotisserie chicken, it’s really easy to pull off the meat while it’s still warm)
  • 2 3/4 C. shredded Monterey Jack cheese
  • 3 Tbsp. butter
  • 3 Tbsp. all-purpose flour
  • 1 (14 oz) can low-sodium chicken broth (I love the Swanson’s brand)
  • 1 C. sour cream
  • 1 (4 oz) can diced mild green chiles
  • optional: chopped cilantro as a garnish

Instructions:

  1. Preheat oven to 425 degrees F. and lightly grease a 9×13 inch glass baking dish.
  2. In a bowl, combine 2 C. shredded chicken and 2 C. of cheese (leave the remaining 3/4 C. of cheese set aside).
  3. Spread an equal amount of chicken/cheese filling into each tortilla. Roll up the tortilla and place seem-side down in the baking dish.
  4. Once all the tortillas are rolled up in the baking dish, get out a saucepan and turn the heat to medium. Melt the butter in the saucepan. Add the flour and whisk together for about 1 minute. Whisk in the chicken broth. Turn up the heat a little bit so it comes to a boil, then reduce heat, stirring frequently so the flour doesn’t burn. The sauce should thicken a bit. Remove from heat and stir in the sour cream and diced green chiles. Pour all of this sauce evenly over the rolled up tortillas in the baking dish.
  5. Bake for 20-25 minutes, or until cheese in melted and golden. If desired, sprinkle with chopped cilantro as a garnish.

white sauce chicken enchiladas

Serve the enchiladas with mashed beans (even warm refried beans from a can will do) and a fresh green salad on the side. We enjoyed having berries or clementines and a brownie or chocolate chip cookie for dessert. Yum!

white chicken enchiladas dinner idea

*Inspired by THIS recipe.

Strawberry Cream Pie with Graham Cracker Crust

coconut cream filling pie
No bake pies are probably one of my Summer-time obsessions. This particular recipe is extra wonderful because it’s definitely one of the healthier no bake pies I’ve made. Easy No-bake Lemon Pie is one of our favorites, but it calls for a container of Cool Whip and a can of sweetened condensed milk. No-bake Nutella Cheesecake is so easy to make and tastes gourmet and No-bake Strawberry Cheesecake is quite the treat as well, but both of these call for a container of Cool Whip and a block of cream cheese. And some extra sugar.

This Strawberry Cream Pie recipe tastes divine, but is made with healthier ingredients than the above recipes. I hope you enjoy!

We used local honey for the first time!

local honey

And here is the picture of the canned coconut cream I got from Trader Joes:

trader joes coconut cream

Strawberry Cream Pie with Graham Cracker Crust

Ingredients:

  • 1 pack of graham crackers, crushed fine
  • 1 stick unsalted butter, melted
  • 1 (14 oz) can coconut cream, cooled overnight in the refrigerator (shake the can at the store. If you hear water sloshing around, don’t buy it. Find one that you can shake without hearing anything inside)
  • 1/4 C. honey
  • 1 tsp. vanilla
  • about 1 lb. fresh strawberries, chopped
  • juice of 1 lime (about 2 tsp.)

Instructions:

  1. For the crust, mix together crushed graham crackers with the melted butter. Usually I use a freezer bag to put the graham crackers in. Then just roll over several times with a rolling pin. Melt the butter in a microwave-safe bowl, then pour the melted butter into the bag and mix well. Then dump the contents of the bag into a glass pie dish. Press down and on the sides until you have a nice graham cracker crust. homemade graham cracker crust
  2. For the pie cream, spoon out the coconut cream from the can and put into a mixing bowl. Dispose of the water from the can (there was only about 1 Tbsp. of water from the can I used). Add honey and vanilla. Mix well with a beater until smooth. Use a spatula to get the coconut cream mixture into the pie crust. Cover with foil and stick it in the refrigerator. coconut cream pie fillingpie with canned coconut cream
  3. For the strawberry topping, just bring the chopped strawberries and lime juice to a boil in  a saucepan. Mash the strawberries up a little (but keep some chunks in there!) Boil for 3-5 minutes, stirring frequently. Remove from heat and let cool completely, then refrigerate. strawberry compote
  4. When you are ready to serve the pie, put the slices (our slices didn’t come out so easily, so just do your best. They may or may not look like pie slices) on plates, then top with a spoonful or two of the strawberry topping.

strawberry pie with coconut cream filling

strawberry cream pie with graham cracker crust

*Inspired by this Chocolate Mousse recipe, this Coconut Cream Strawberry Parfait, and this Strawberry Compote recipe.

American Goulash (Easy, Stove Top)

American Goulash (pretty much elbow macaroni, ground beef and diced tomatoes) is something I’ve been wanting to make for a while now. Who knows why it has taken me so long, because wow! It was so easy to make and tasted great!

There are probably endless amounts of variations you could make. Add an extra can of diced tomatoes or a can of tomato sauce. Add a little ranch dressing. Add some kidney beans. Add bell pepper. Eat it with cottage cheese instead of or with the cheddar. However you like it 🙂

easy american goulash recipe

Easy American Goulash Recipe

Ingredients (about 6-7 servings):

  • 1 Tbsp. light olive oil
  • 3 cloves garlic, minced
  • 1 yellow onion, chopped
  • about 1 lb. lean ground beef (I used a 90/10 ratio and didn’t have to bother draining out the fat)
  • 1/2 Tbsp. Italian Seasoning
  • 1 can diced tomatoes
  • 1 1/2 C. dry elbow macaroni
  • 1 1/2 C. water
  • 1/2 tsp. salt
  • optional: 1 C. grated cheddar cheese, or just some to garnish

Instructions:

  1. Heat a large pot (that has a fitted lid) to medium heat. Add olive oil and swirl it gently to coat the bottom of the pot. Add garlic and onions. Saute until onions become translucent.
  2. Crumble the raw ground beef into the pot with the garlic and onions. Cook thoroughly and add the Italian Seasoning.
  3. Once the meat is all browned and cooked, add the diced tomatoes, elbow macaroni, water and salt. Bring to a boil. Cover with lid and reduce heat to medium/low and let simmer for 10-12 minutes, or until macaroni are soft enough to your liking.
  4. Stir in the grated cheese if desired, or use the cheese as a garnish. Serve immediately.

Serve this goulash with hot cornbread and a ranch-style salad or fresh crispy vegetables like baby carrots, cucumbers or bell pepper slices.

*Inspired by THIS recipe.

Flakey Butter Biscuits

Oh my goodness, these biscuits are so good! I usually make Baking Powder Biscuits, but wanted to try using butter instead of shortening. This looked like an easy enough butter biscuit recipe and boy am I glad we gave it a try. 🙂

These biscuits are fluffy and flakey. Crispy on the bottoms and the tops. We served them with some pan-cooked salmon patties, fresh bell pepper slices and steamed zucchini. Everything came together pretty quickly and the dinner was delicious!

I’d love to try making these for breakfast sometimes, served with sausage and fresh fruit. Yum!

Flakey Butter Biscuits

Ingredients (makes 12 biscuits):

  • 2 C. all-purpose flour
  • 3 tsp. baking powder
  • 1/2 tsp. salt
  • 1/2 tsp. cream of tartar
  • 1/2 C. (or 1 stick) cold/frozen butter, cut into smaller pieces
  • 1 Tbsp. honey
  • 2/3 C. milk (I used whole milk) plus about 1 tsp. milk

Instructions:

  1. Preheat oven to 450 degrees F. and line a baking sheet with parchment paper.
  2. In a bowl, combine honey and 2/3 C. milk. Stir and set aside (if you let it just sit for about 15/20 minutes, the honey dissolves into the milk).
  3. In another bowl, combine flour, baking powder, salt and cream of tartar. Whisk together well.
  4. Add the chopped up cold/frozen butter pieces to the flour mixture. Cut the butter in with two butter knives until the pieces get smaller, about pea-sized (I got impatient and some of the butter chunks were bigger and the biscuits still turned out amazing).
  5. Stir in the milk/honey mixture until everything is moistened (then put about a tsp. of milk into the bowl and set aside). Knead a few times with your hand to get it all together. Fold the dough in half, press down gently. Fold in half again and press down gently. You can do it a third time too. This helps create the layers while baking.
  6. On a lightly floured surface (like a cutting board), gently press the dough down with your hands or a rolling pin until it’s about 3/4 inch high. Cut into 12 pieces. Brush the teaspoon of milk onto the tops of the biscuits (or just use a clean finger to do this). Place each biscuit on the baking sheet and bake in preheated oven for about 9-11 minutes, or until golden on the tops.                                                  cutting butter biscuits        dinner biscuits        flakey butter biscuits

You can spread a little salted butter on the tops right after they come out of the oven if desired. Serve hot!

*Inspired by THIS recipe.

Hint of Mint Lemonade

This simple mint lemonade is so refreshing on a hot Summer day! If you don’t have any mint, you can make the recipe without it and the lemonade itself still tastes great.

If you want to freeze the lemonade mixture, just put the sugar, lemon juice, and mint leaves in a baggie. Label the bag and write “add 4 C. water”. Freeze and enjoy later.

minted lemonade

Hint of Mint Lemonade

Ingredients (makes about 4 servings):

  • 3/4 to 1 C. fresh squeezed lemon juice (from about 4-6 lemons) lemons
  • 1/3 C. granulated sugar
  • 4-5 C. water
  • about 10 fresh mint leaves                                      fresh mint leaves
  • optional: more mint or lemon to garnish and ice cubes

Instructions:

  1. Put the sugar in a pitcher. Add lemon juice and stir until sugar is dissolved.
  2. Add water and mint leaves. Stir.
  3. Refrigerate for about 1 hour before serving (If you refrigerate longer, remove mint leaves after about 2 hours).

lemonade with mint leaves fancy lemonade

*Inspired by Olivia and THIS recipe.

Beef Steak Tips on the Stove

Lately I’ve learned to get good meat. Natural, grass fed, not close to expiring. It just makes me feel so much better eating it and feeding it to my family. Sometimes I go for the cheaper stuff, but I try to remind myself to get quality over quantity most the time. I don’t think we need very much meat anyway.

beef steak tips

beef steak tips marinade

Beef Steak Tips on the Stove

Ingredients:

  • 1 lb. vegetarian-fed beef steak tips (I got ours from Trader Joes)
  • 1/3 C. Barbecue Sauce (again, I got it from Trader Joes)
  • 2 Tbsp. apple cider vinegar
  • 2 Tbsp. light olive oil plus a little to coat the pan
  • 1/4 tsp. garlic powder
  • 1/4 tsp. ground black pepper
  • optional: lemon zest as a garnish

Instructions:

  1. In a bowl, stir together barbecue sauce, apple cider vinegar, olive oil, garlic powder and black pepper. Add the raw beef steak tips and mix together. Cover bowl tightly with plastic wrap and let marinate for 30 min. to an hour in the refrigerator (I did 30 min.) barbecue sauce beef steak tips
  2. Heat a pan to medium-high heat. Add a little olive oil to lightly coat the bottom of the pan. Add the marinated beef steak tips (I was generous with adding some of the sauce too). Discard any extra sauce.
  3. Cook and stir continuously for 10-12 minutes, or until inside of meat is no longer pink. how to cook beef steak tips on the stove
  4. Remove from heat and let sit 3-5 minutes. Serve hot. Grate a little lemon zest on top as a garnish if desired. It adds a nice little lemony flavor too 🙂

We served this delicious meat with mashed beans and a fresh green salad.

*Inspired by THIS recipe.

Easy No Bake Lemon Pie (Revisited)

I made No-Bake Lemon Pie for Father’s Day again.

It was a request 🙂 And it’s a perfect Summer dessert.

easy no bake lemon pie

One thing I’ve learned with this pie is to not used dollar store graham cracker crust. You may get lucky, but when I tried it really tasted like cardboard. Really. That same time, I was very liberal with the amount of lemon juice and we didn’t let it sit in the refrigerator long enough, so it was pretty runny and had a horrible crust.

But somehow it was requested again this year. My kids and I made the crust together.

  • 1 pack of graham crackers
  • 1 stick of butter (1/2 C. unsalted), melted
  • 2 Tbsp. brown sugar

We just put the graham crackers in a freezer bag and rolled over it several times with a rolling pin. Then mixed the sugar in there and added the melted butter and shook it up a bit. Press firmly onto the bottom and sides of the pie dish.

homemade graham cracker crust

You can even make the crust several days in advance. Just put some foil on top of it, then remove the foil when you’re ready to add the filling to the pie.

For the filling, we used:

  • 1 (14 oz) can sweetened condensed milk
  • zest of 1 lemon
  • 1/2 C. fresh-squeezed lemon juice (3-4 lemons)
  • 1 (8 oz) container regular Cool Whip, thawed in the refrigerator
  • optional, but recommended: 1-2 coarsely crushed graham crackers sprinkled on top of the filling

Beat together the sweetened condensed milk with lemon zest and lemon juice until well combined. With a spoon, fold in the cool whip until combined.

no bake lemon pie filling

Spoon the filling into the prepared pie crust.

no bake lemon pie

Top with crushed graham crackers (as you refrigerate, the graham crackers absorb moisture from the pie and get soft and they are delicious!).

graham cracker crust lemon pie

Refrigerate for at least 2 hours, but half a day or overnight is my preference 🙂

easy lemon pie

*Inspired by THIS crust recipe and THIS lemon cloud pie recipe.

4th of July Snack

I’ve always wanted to make those multi-colored, layered jellos, but it looks like I’d have to be a little more ambitious to actually get around to that.

If you want to be festive and patriotic with your food on the 4th of July, try this easy red, white, and blue snack. Super quick and easy to throw together!

4th of July Snack Recipe

Ingredients:

  • vanilla yogurt (Lately I’ve been enjoying Open Nature Greek Vanilla yogurt)
  • blueberries
  • strawberries and/or raspberries
  • optional: chopped walnuts or pecans

I served it on white plates because those are what we have, but if you have red or blue bowls, I think that would be super duper cute.

Enjoy this healthy snack!

4th of july snack


Tuna Dip (Quick and Easy)

This dip is really simple and you can make it in a flash. I don’t add salt because I usually eat it with salty chips or crackers, but if you eat it with veggies, a little salt and pepper might be good.

tuna dip ingredients

tuna dip

Tuna Dip Recipe

Ingredients:

  • 1 can/package tuna in water, drained
  • real mayonnaise (1 Tbsp. plus more if you think it needs more)
  • relish (1-2 Tbsp. or more if you think it needs more)

potato chips, corn chips or crackers to dip          what to dip with tuna dip

Instructions:

Combine drained tuna, mayo, and relish in a bowl and stir to combine. Always start out with a little mayonnaise and relish. You can add more if it needs it.  easy tuna dip ingredients

  • Serve the dip with chips or crackers.

tuna dip with potato chip