Banana Pineapple Smoothie with Coconut Milk

Tonight we tried a few new ingredients to our regular smoothie recipe. It turned out delicious! This smoothie is naturally sweet and has a somewhat neutral flavor. I don’t have the exact quantities of everything, but I’ll do my best to guess somewhat accurately. 🙂 You can always add a little more of something if you need to.

Banana Pineapple Smoothie with Coconut Milk

Ingredients:

  • 2 ripe bananas (not overly ripe, just the kind that start getting brown speckles on the skins)
  • about 1 C. frozen pineapple tidbits (I get these from Trader Joes)
  • 1 thick slice of jicama (probably 1 C. chopped)
  • juice of 1/2 a lime (I would have used a whole lime if we had a whole one)
  • 1 handful frozen baby spinach
  • 2 or 2 1/2 C. organic So Delicious coconut milk

Instructions:

Just blend everything together. You can add more coconut milk if you want a thinner consistency, or less if you want a thicker consistency. One thing I love about coconut milk is that it has a longer shelf-life than regular cow’s milk, which needs to be refrigerated. Coconut milk doesn’t need to be refrigerated until you open it.

This banana pineapple smoothie was so refreshing on a warm evening- hope you enjoy it too!

13 Salads to Eat this Summer

I love eating salads. They always seem to add color to a meal. And I feel way healthier when I eat salads. You know, all those veggies, fruit, nuts, and protein. To be honest, my salads usually consist of romaine lettuce leaves and yeah, that’s about it. Sometimes we throw on some chopped tomatoes too.  However, when I do actually plan a specific salad to make with other ingredients and a little dressing, they are so tasty and I always end up thinking I could eat that salad every day for the rest of my life!

Here is a list of 13 delicious salads you can try this Summer. Some of them make great side salads, and others are filling enough to be used as a main course.

Salads

  1. Easy and Delicious Green Salad (Spaghetti Salad)

  2. Quinoa Salad

  3. Green Salad with Mozarella Cheese

  4. Vegetable and Ranch Dressing Salad

  5. Chili Salad

  6. Perfect Fruit Salad

  7. Healthy Chickpea Salad Recipe with Cucumber, Tomato, and Avocado

  8. Romaine and Avocado Salad Recipe

  9. Broccoli Salad Lunch Recipe

  10. Green or Purple Coleslaw Recipe

  11. Filling Summer Salad

  12. Chinese Chicken Salad

  13. Macaroni Pasta Salad with Chicken and Vegetables

What are some of your favorite salads?

Fluffy Whole Wheat Biscuits

We made some delicious vegetable chicken soup tonight but wanted to make some biscuits to go with it. I almost made THESE yummy baking powder biscuits, but decided to try out a biscuit recipe that had some whole wheat flour in it. I’m not quite ready to do a full on pure whole wheat biscuit recipe, but half and half is a good start. 🙂

Along with having some whole wheat in these biscuits, the recipe calls for butter instead of shortening, so it’s a little healthier than those baking powder biscuits I almost made. I feel like this is a great recipe to keep in our biweekly or monthly recipe rotation (if I ever get organized enough to actually make a rotation list for us).

These whole wheat biscuits are fluffy and flaky. They taste great and although we ate them with soup tonight, I think they’d be just as good as a breakfast or snack biscuit with a little butter and jam.

Fluffy Whole Wheat Biscuits Recipe

Ingredients (12 biscuits):

  • 1 C. whole wheat flour
  • 1 C. all-purpose flour
  • 4 tsp. baking powder
  • 1 Tbsp. granulated sugar
  • 1/4 tsp. salt (you can use about 3/4 tsp. salt if you use unsalted butter)
  • 1/4 C. butter, room temperature
  • 3/4 C. buttermilk or milk (just add about 1 Tbsp. lemon juice or distilled white vinegar to the milk to make a buttermilk substitute.)

Instructions:

  1. Preheat oven to 450 degrees F.
  2. In a medium mixing bowl, stir together whole wheat flour, all-purpose flour, baking powder, sugar, and salt.
  3. Cut the butter in with a knife until mixture resembles coarse cornmeal.
  4. Stir in milk/buttermilk just until moistened.
  5. Gently shape dough into 3/4 inch thick and about 2 or 2 1/2 inch in diameter circles and place onto lightly greased cookie sheet.
  6. Bake for 9-10 minutes, or until lightly golden brown around the edges.

fluffy whole wheat biscuits whole wheat biscuits

Serve the biscuits fresh out of the oven with a little butter to spread on them. Goes great with vegetable chicken soup!

*Inspired by THIS recipe.

Parmesan Garlic Noodles

Sometimes I crave garlic. Especially when it’s garlic cooked in a little bit of salted butter. This recipe takes two wonderful flavors, Parmesan and garlic, and puts them together over whole wheat spaghetti noodles. It’s delicious. And pretty healthy (especially if you have a nice big salad on the side).

whole wheat spaghetti with parmesan and garlic

Tonight my 4-year-old told us he didn’t want spaghetti. Just a peanut butter and honey sandwich with no top, cut in triangles. Then Busy Dad agreed. He wasn’t in a pasta mood. And our little girl decided she’d rather have a sandwich too. So I told them they didn’t have to eat what I made, but that I wouldn’t make anything else tonight.

However, they all wanted leftover DOUBLE-LAYER CHOCOLATE CAKE for dessert. Ha! We decided they had to at least try the dinner if they wanted cake for dessert. And they did. And all three of them were surprised that they actually really liked these Parmesan Garlic Noodles!

Parmesan Garlic Noodles Recipe

Ingredients:

  • 8-10 oz whole wheat spaghetti noodles, cooked (about 10 min.) according to package instructions (I love the organic whole wheat spaghetti from Trader Joes)
  • 2-3 Tbsp. butter
  • about 1 Tbsp. light olive oil
  • 5 cloves garlic, minced
  • 1/3 C. grated Parmesan cheese
  • kosher salt, to taste
  • about 1-2 tsp. dry parsley (mixed in) or fresh parsley as a garnish
  • optional: sliced mushrooms
  • optional: a pinch of grated cheddar cheese as a garnish

Instructions:

  1. Cook spaghetti according to package instructions. Get started with instruction #2.  Drain and rinse under cool water.
  2. Heat a skillet to medium heat. Add the butter and olive oil. Carefully swirl it around. Once all the butter is melted, add the garlic. Mix and cook for about a minute or two until the garlic is fragrant. Add sliced mushrooms, if desired, and cook a few more minutes.
  3. Mix in the drained spaghetti noodles.
  4. Remove from heat and stir in the Parmesan cheese.
  5. Add salt to taste (remember, just a little salt at a time). If you want to mix in dry parsley flakes, you can do that now too.
  6. Serve with some fresh parsley and/or a pinch of grated cheddar cheese as a garnish. parmesan garlic spaghetti dinner idea

Goes great with a fresh green salad! We made ours with green leaf lettuce, cucumber slices, and diced avocado. I totally would have added fresh tomatoes if we had them.

meatless monday dinner idea

*Inspired by THIS recipe.

Have questions while cooking? Use TalkToChef

Have you noticed the red rectangular widget button, TalkToChef, on the left side of this site? I recently became an affiliate with them and I’m very excited for you to be able to get professional culinary help while cooking or baking. I’m not a professional, and I’ll admit, there are probably better and easier ways to cook some of the recipes on this site.

Here’s how it works:

Let’s say you’re making French Chocolate Mousse for the first time. You found a delicious looking recipe. You went grocery shopping. Just after cracking the last egg, you realize you actually don’t have any cream of tartar. The recipe doesn’t call for very much. Should you just skip it? Is it worth borrowing some from the neighbor or running back to the grocery store? Is there anything you have that would work as a substitute? Talk to chef!

Your Dinner Rolls dough isn’t rising like the recipe says it should. What may have gone wrong? Is there anything you can do to help it rise, or is it too late? Talk to chef!

Lemon Blueberry Muffins look delicious, and you happen to have blueberries and a few lemons in your kitchen! But you’ve been trying really hard to eat healthier. Is there anything you can add, subtract or substitute to modify this recipe to meet your health standards? Could you leave out some of the sugar? Could you use part or all whole wheat flour and still get a similar consistency and taste? Is there any way to add more protein to the muffins? Talk to chef!

Your daughter has several sudden new dietary restrictions and her birthday is coming up next week and she has really been craving chocolate cake. You are determined to get her some chocolate cake, but where is a good, acceptable recipe taking into account her new dietary restrictions? Talk to chef!

When you’re in the kitchen and have a culinary question, there is a professional chef somewhere in the world excited to answer it! If you’re following an online recipe, it’s great to post your question online, but sometimes it takes time to get a response. If you need an immediate response, TalkToChef has many chefs ready to video chat with you right in your time of need.

Cauliflower Chowder

Cauliflower has never been one of my favorite vegetables. I don’t usually buy it, but when I do, I feel like it’s such a challenge to actually eat it. When I found a recipe for Cauliflower Chowder, I decided to buy a head of cauliflower (it was even organic!). We used it all up in the same recipe and the recipe turned out great!

cauliflower chowder garnished with bacon

This Cauliflower Chowder reminds me a lot of THIS Creamy Potato Soup, which I absolutely love.

Cauliflower Chowder Recipe

Ingredients:

  • 4-5 slices bacon
  • 2 cloves garlic, minced
  • 1 yellow onion, diced
  • 2 large carrots, peeled and diced
  • 2-3 stalks celery, diced
  • 1 head cauliflower, roughly chopped
  • 1/4 C. flour
  • 4 C. low-sodium chicken broth
  • 1 C. 2% milk
  • kosher salt and black pepper to taste
  • optional: grated cheese and/or fresh parsley to garnish (along with the bacon)

Instructions:

  1. Heat a large soup pot to medium-high heat. Put the bacon in there and cook until crispy, about 7 minutes. Transfer bacon to a paper towel-covered plate. Set aside. Remove bacon grease, but leave about 1 or 1 1/2 Tbsp. of the grease in the pot. cauliflower chowder with bacon
  2. Add chopped onions, garlic, carrots, and celery to the bacon grease. Cook on medium heat for about 5 minutes, or until onions become translucent.
  3. Stir in the roughly chopped cauliflower and cook for about another 5 minutes. cauliflower soup recipe
  4. Sprinkle flour on top, and stir in for about 1 minute. Then slowly stir in the chicken broth and milk. Bring to a boil, then lower heat and simmer about 20 minutes, or until cauliflower is tender.
  5. Carefully blend about 1/4 of the soup and add it back into the soup pot. This just helps the soup get nice and creamy. Add salt and pepper to taste.
  6. Serve garnished with crumbled bacon, grated cheese, and/or chopped fresh parsley.

We served this cauliflower chowder with EASY GARLIC BREADSTICKS on the side.

healthy cauliflower chowder recipe

*Inspired by THIS recipe.

Chocolate Buttercream Frosting

Do any of you scrape off the frosting when you eat cake? Or at least most of it?

I usually do. Sometimes it’s too sweet. One time it tasted like chemicals. And sometimes there is just way too much frosting that I can’t even taste the cake!

My husband usually asks for chocolate cake with chocolate frosting for his birthday. Last year we made him a CHOCOLATE ZUCCHINI CAKE, which tasted great and was even on the healthier side of chocolate cakes. 🙂 And there wasn’t really a frosting on that cake.

This year I really wanted to try making a DOUBLE-LAYER CHOCOLATE CAKE with a chocolate buttercream frosting.

And I did.

It was amazing. Busy Dad said it’s the best chocolate cake he’s ever tasted. Rich and moist, but not dense. The frosting had a perfect texture and taste.

chocolate buttercream frosting for double layer cake

Chocolate Buttercream Frosting Recipe

Ingredients (makes enough to frost a double layer circular cake and still have about a cup of frosting left over):

  • 2/3 C. unsweetened cocoa
  • 2 sticks salted butter, softened (but not melted)
  • 2 1/2 C. powdered sugar
  • about 4 Tbsp. milk (I used 2%)
  • 2 tsp. vanilla

Instructions:

  1. Add unsweetened cocoa to large mixing bowl and whisk through to remove any large lumps.
  2. Beat in the softened butter. First it will get clumpy, but keep beating until smooth.
  3. Add 1 C. powdered sugar and 1 Tbsp. milk. Beat until blended. Then beat 1 minute more on high speed (this helps it get fluffier). Add another cup of sugar and another 2 Tbsp. milk. Beat, then beat on high for another minute. Add the remaining 1/2 C. sugar and the remaining tablespoon of milk. Beat, then beat on high for another minute.
  4. Add vanilla and beat until well blended, smooth and creamy. The frosting should be stiff enough to hold it’s form. If it needs to be thicker, add a little more sugar. If it’s too thick, add a little more milk.

chocolate buttercream frosting recipe

*Inspired by THIS recipe.

Double-layer Chocolate Cake

I looked up “chocolate cake” on Pinterest and just about all of the chocolate cake recipes claimed to be THE BEST chocolate cake recipe. Others claimed to be THE BEST EVER. Yeah, so you can imagine it was pretty hard picking which recipe to use.

Maybe you just can’t go wrong with chocolate cake. Every single chocolate cake is the best. The best ever.

But really, I have gone wrong with chocolate cake before. I tried to healthify a recipe. I can’t remember what I used, but probably a combination of applesauce, banana, coconut oil, and a clumpy homemade cream cheese frosting. It was very moist and dense. Not to mention bland since I skimped majorly on the sugar. And the frosting just wasn’t very good with it at all.

So this time I decided to go with a real chocolate cake. The unhealthy kind. The kind that makes you feel guilty with every bite because you know how much sugar is in there. The kind that doesn’t have any added fruit. The kind you probably will only make once a year, for a special occasion. Like your husband’s birthday!

I found the perfect recipe. In fact, it was called THE BEST CHOCOLATE CAKE RECIPE {EVER}. You could have guessed that though. 🙂 Pretty much the only change I made is that I did not add any coffee to the cake or the frosting. And guess what! It was still amazing.

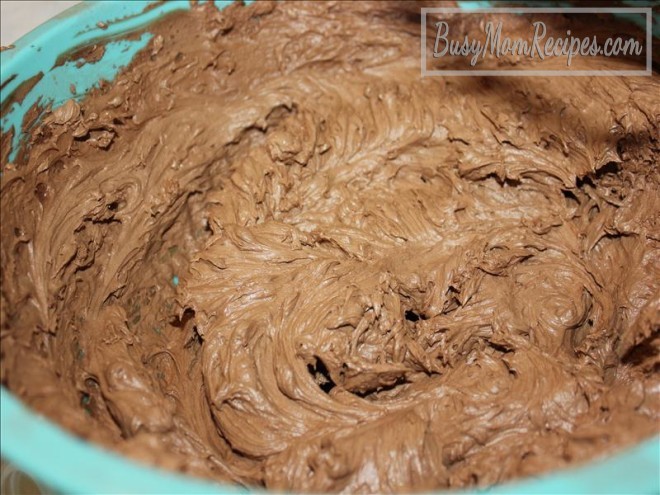
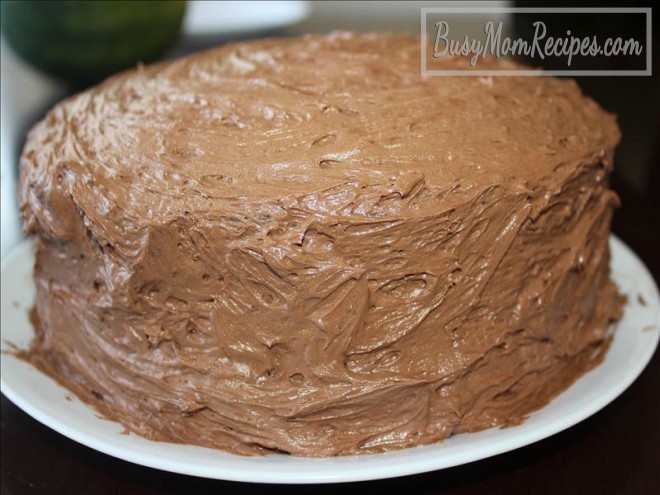
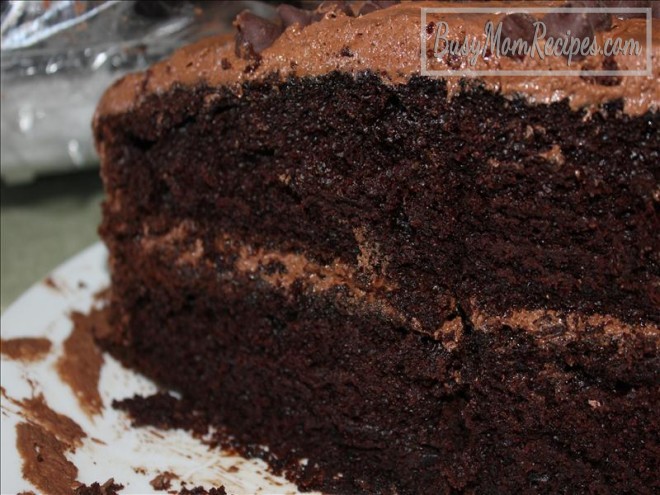
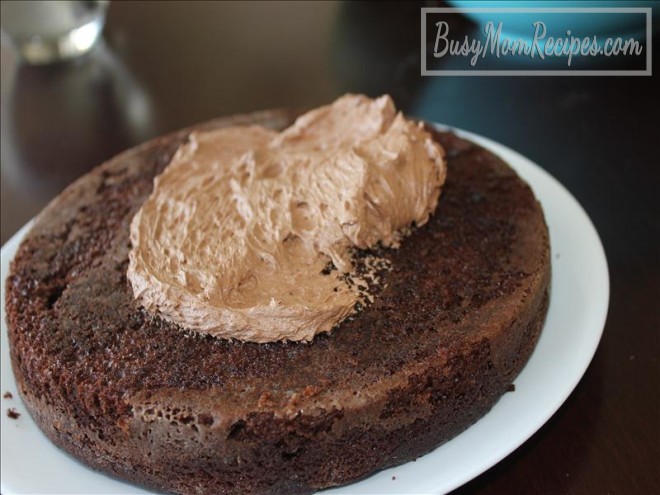
This recipe is simple and the cake has just the right texture and moistness. Not too dense, but not too light and airy either. It has a rich chocolatey flavor, and tastes amazing with CHOCOLATE BUTTERCREAM FROSTING (which I’ll post next week!).

chocolate cake with chocolate frosting

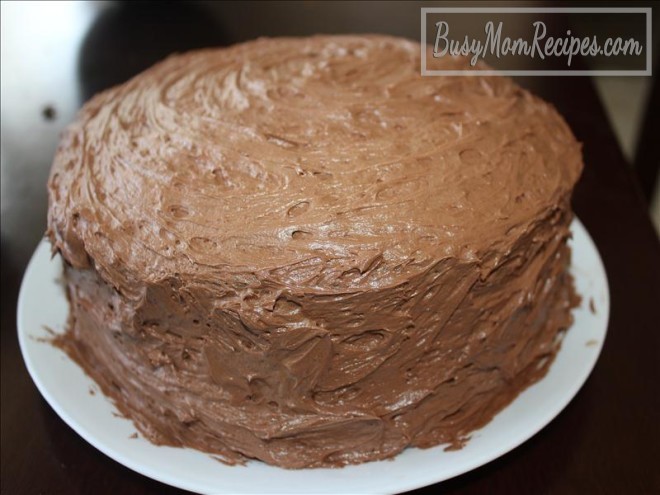
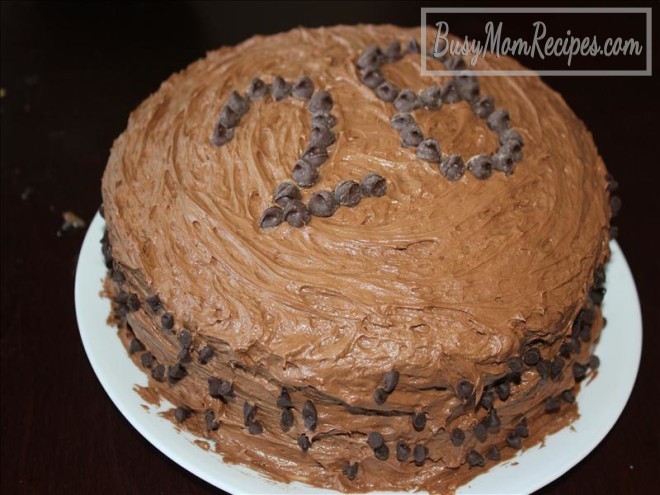
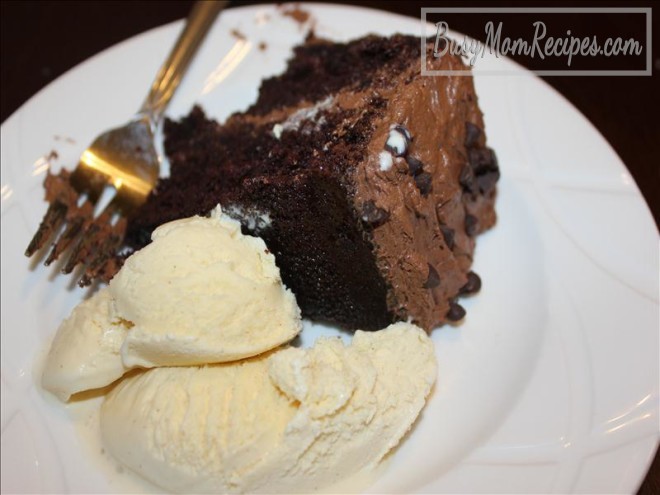
You can decorate it with chocolate chips. I used regular semi-sweet chocolate chips on the top, and mini semi-sweet chocolate chips on the sides. Actually, those mini chocolate chips were the most fun part of decorating the cake. You just put a few in your hand at a time and toss them onto the side of the cake. Pretty fun.

easy cake decorating with chocolate chipschocolate chocolate birthday cake

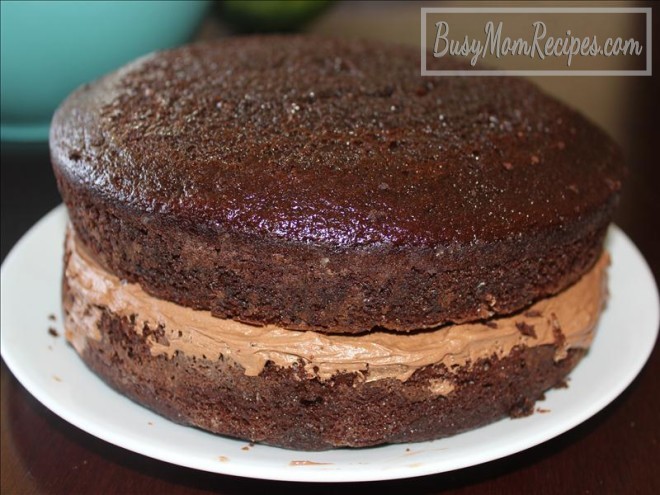
Double-layer Chocolate Cake Recipe

Ingredients:

  • 2 C. all-purpose flour
  • 2 C. granulated sugar
  • 3/4 C. unsweetened cocoa powder
  • 2 tsp. baking powder
  • 1 1/2 tsp. baking soda
  • 1 tsp. salt
  • 1 C. milk (I used 2%)
  • 1/2 C. Canola oil
  • 2 eggs
  • 2 tsp. vanilla
  • 1 C. boiling water
  • optional, but highly recommended: CHOCOLATE BUTTERCREAM FROSTING

chocolate cake with buttercream frostingdouble-layer chocolate cake with chocolate buttercream frosting

Instructions:

  1. Preheat oven to 350 degrees F. Grease and lightly flour 2 9-inch round cake pans. Set aside. Start boiling a cup of water.
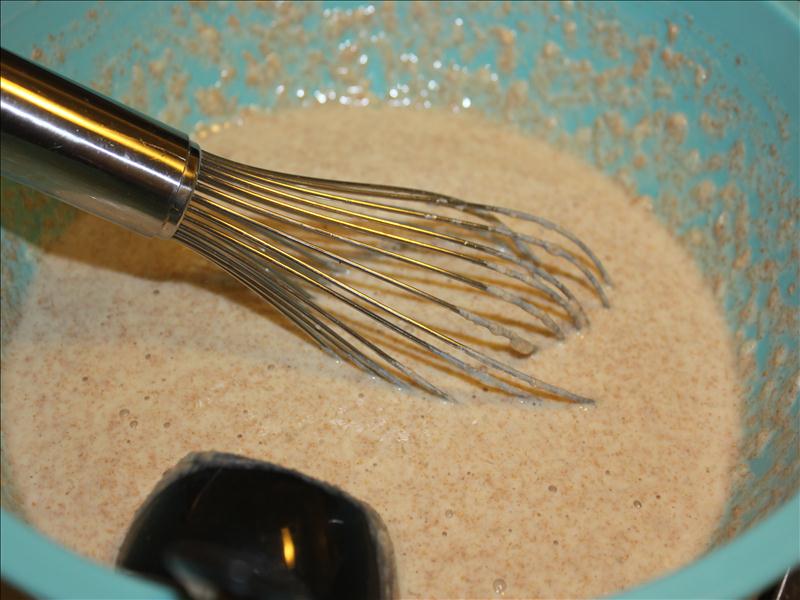
  2. In a large mixing bowl, combine flour, sugar, cocoa powder, baking powder, baking soda and salt. Whisk through to remove any lumps.
  3. Add milk, oil, eggs, and vanilla to the dry mixture. Mix together on medium speed until smooth. Reduce speed of the beaters and slowly add boiling water to the mixture. Beat on high speed for about a minute to add air to the cake batter.
  4. Pour batter evenly into the two round pans. Bake in preheated oven for about 30-33 minutes, or until toothpick comes out clean.
  5. Let cool about 10 minutes in the pans. Then remove from pans and let cool completely before frosting.

the best chocolate cake ever

*Inspired by THIS recipe.

Whole Wheat Pancakes

These are tasty full-on whole wheat pancakes!

whole wheat pancakes

Whole Wheat Pancakes

Ingredients (makes about 12 pancakes):

  • 2 C. milk minus 2 Tbsp. (see next ingredient)
  • 2 Tbsp. apple cider vinegar
  • 2 C. whole wheat flour
  • 4 tsp. granulated sugar
  • 1 tsp. baking powder
  • 1/2 tsp. baking soda
  • 1/2 tsp. salt
  • 2 eggs
  • 2 tsp. vanilla
  • 4 Tbsp. (1/2 stick) melted butter, plus more butter for greasing the skillet

Instructions:

  1. Get out a medium and a large mixing bowl. Fill up a 1 C. measuring cup with the 2 Tbsp. vinegar and the rest milk. Pour into medium bowl. Add 1 more cup of milk. Stir in the medium bowl and set aside to curdle.
  2. In the large bowl, whisk together whole wheat flour, sugar, baking powder, baking soda, and salt. Set aside.
  3. Add eggs, vanilla, and melted butter to the milk mixture. Whisk together.
  4. Pour the milk mixture into the dry flour mixture. Whisk together just until moistened. Keep it clumpy. Don’t over-mix. whole wheat pancakes that still taste good
  5. Heat a skillet to medium heat. Put a little butter in there and carefully swirl it around. Add about 1/4 C. of the pancake batter for each pancake.
  6. Once the pancake has lots of little bubbles all over it, it is ready to flip. Cook on the second side for about a minute, or until done.
  7. Serve immediately with your favorite syrup.

*Inspired by THIS recipe.

Basil Bites

fresh basil

This is my new favorite snack! Sometimes I buy basil thinking I’ll make pesto or pizza sauce with it, and then it doesn’t happen. So I need to use up the basil before it goes bad, and this is the perfect way!

I’m sure there are a variety of ways to make fresh basil last a little longer. Here’s what I usually do:

When I get home from the grocery store, I fill up a glass about halfway with water, trim the basil stems, and stick them in the cup of water. Then I take a plastic bag and gently place it over the top of the basil. Sometimes I roll up the bottom of the bag so it’s not quite touching the counter. About every two days, just trim the stems and replace the water with fresh water.

how to keep basil fresh longer plastic bag over basil in water

Of course it doesn’t last forever, but it lasts longer than it would if I stick it in the refrigerator or leave it in a bag on our counter.

Basil Bites

Ingredients:

  • fresh basil leaves, washed and dried
  • Saltine crackers
  • Precious low moisture part skim mozzarella cheese, sliced

Instructions:

Put some Saltine crackers on a plate. Top each one with a slice of cheese and a basil leaf (or half a basil leaf if it’s a big leaf).

basil bites snack idea

Enjoy!