Fluffy Pancakes (Old Fashioned Style)

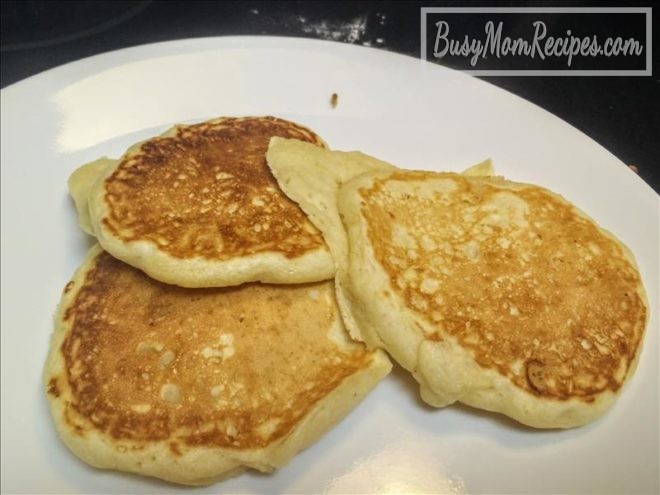
Have you ever heard the advice to make half your grains whole? Well, the thought of being able to enjoy these fluffy, old fashioned style pancakes helps give me the extra boost of motivation to eat whole wheat pasta for dinner and whole wheat bread on my sandwiches 🙂

These fluffy pancakes smell and taste amazing and are super easy to make!

Fluffy Pancakes (Old Fashioned Style)

easy old fashioned pancakes

Ingredients (makes about 20 fluffy pancakes):

  • 3 Cups all purpose flour
  • 4 Tbsp. Granulated sugar
  • 5 tsp. Baking powder
  • 1/2 tsp. Salt
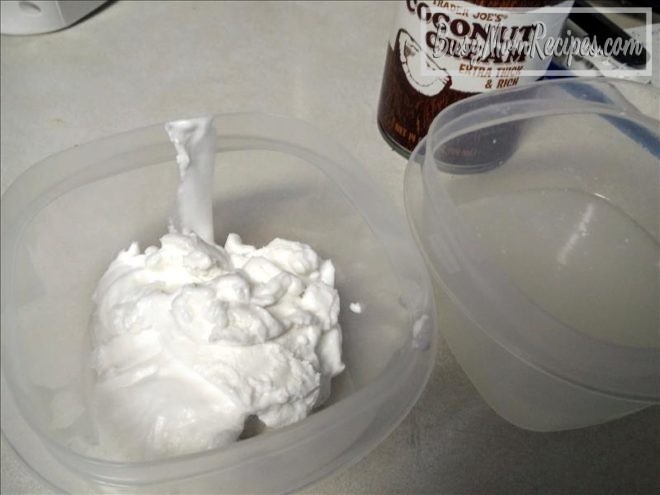
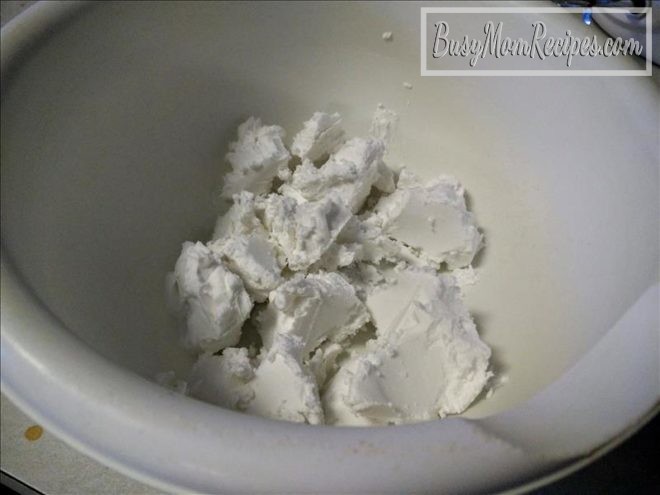
  • 6 Tbsp. Salted butter
  • 2 1/2 Cup soy milk (room temperature is best)
  • 2 eggs (room temperature is best)
  • 1 tsp. Vanilla

Instructions:

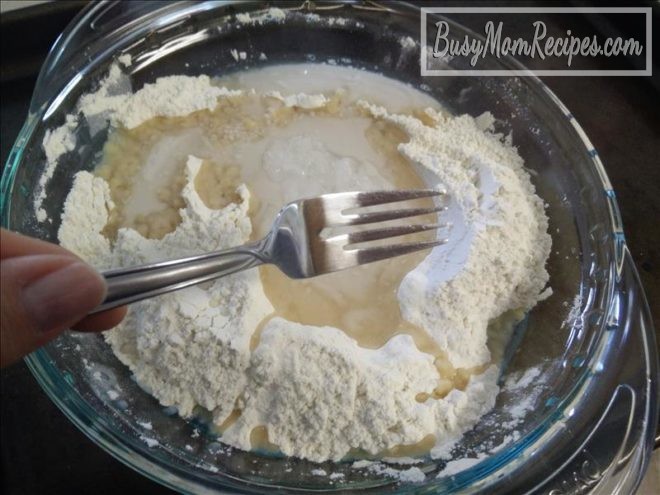
  1. In a small mixing bowl, use a whisk to stir together the flour, sugar, baking powder and salt. Set aside.
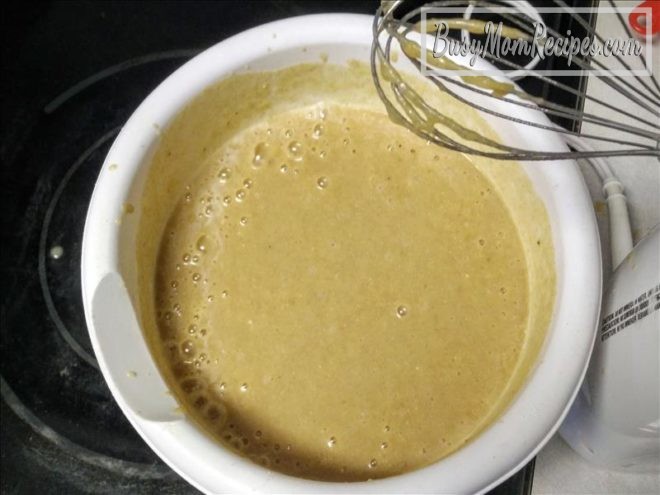
  2. In a large glass (microwave safe) mixing bowl, melt the butter in the microwave. Whisk in the milk, eggs and vanilla.
  3. Add dry ingredients to the wet ingredients and use whisk to stir just until moistened. Let sit for 5 minutes.
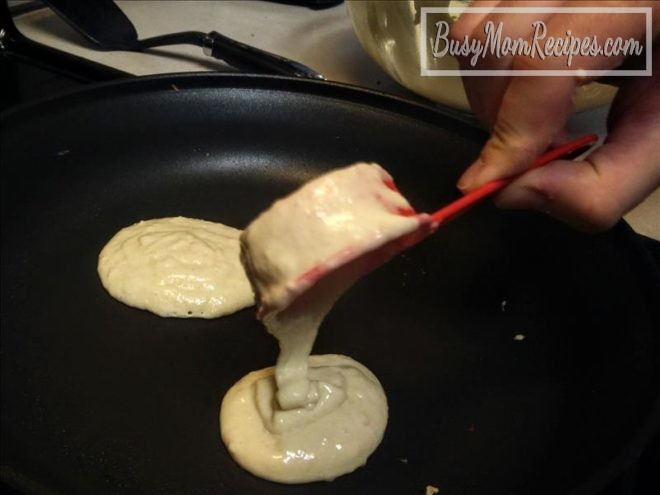
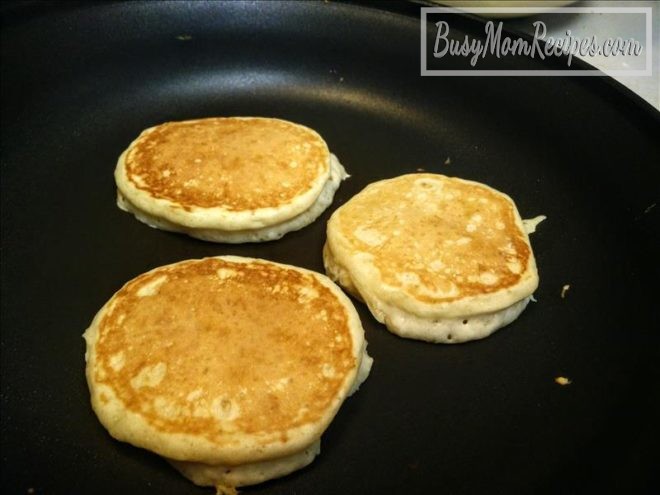
  4. Heat a skillet to medium/medium-high heat. Spray lightly with cooking spray. Add 1/4 C. pancake batter to the skillet for each pancake. Cook for 2-3 minutes on the first side (or until there are little bubbles all over the top of the pancake). Flip, and cook about 1 or 2 minutes on the second side. fluffy pancake recipe easy homemade fluffy pancakes
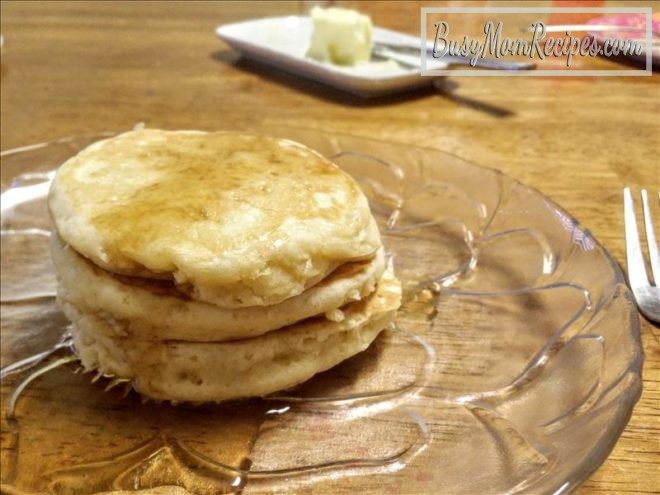
  5. Serve hot, with butter and pure Maple syrup. Enjoy! old fashioned fluffy pancakes

*Inspired by THIS recipe.

Healthy Habits with Small Changes

It’s been a while since I’ve posted anything in the Healthy Eating Habits category. It probably looks like my family eats a whole lot of sweets and carbs from most of my posts. And I’m not gonna lie. We do. But at the same time, there are a few small things we do to be healthy (and keep our kids healthy), and I feel like those small things really make a big difference. And for some reason it’s harder for me to blog about the small, daily things we do/eat than it is to blog about our once a year CHOCOLATE CAKE.

Here are a few routine things we do:

  • Smoothies. Usually it’s a combination of a banana, frozen pineapple, mango, frozen baby spinach (or sometimes fresh baby kale), vanilla yogurt, water, and maybe half a cucumber, some berries, or a peeled kiwi (depending on what we have).  It brings me peace of mind knowing that my kids are getting some leafy greens and a variety of fruits too. I don’t keep the ingredients a secret. They know there’s spinach in their smoothies. Sometimes they even put it in themselves.
  • Healthy Mexican Food. I see Mexican food two ways. Think Nacho Cheese Chalupa from Taco Bell. Oh boy, it tastes so good, but I usually get heartburn after eating one of those. Now think of Chipotle, where they use things like fresh vegetables, beans, and real meat. Cafe Rio is probably my favorite though! We make homemade beans at home probably every two or three weeks (and about 1 lb. dry beans lasts my family of four about a week to finish). They are healthy, inexpensive, filling and they make things taste great (like burritos)! I still need to post how I usually make them.
  • We’ve made the switch to whole wheat spaghetti noodles (my favorite whole wheat spaghetti brand so far is Trader Joe’s). And I’m so happy we did! They are more filling, so I don’t eat as much, and they are way more nutritious than the regular spaghetti noodles.
  • We very rarely drink soda, or even juice. Usually just water or milk, but we do enjoy a little juice every once in a while. 🙂
  • My kids are more likely to eat vegetables in simple forms. They will almost always eat steamed broccoli and carrots. They’ll eat parsley and celery if I add it into soups, like LENTIL SOUP or CREAMY POTATO SOUP. They are also more likely to eat vegetables if I serve them as appetizers while they wait for dinner to be ready (see THIS post).

In summary, when I’m hoping to change my eating habits for the better, I try to make small, but concise, changes at a time. For example, when I decided that drinking soda just wasn’t worth the damage, I just stopped drinking it at all (although I still ask for Ginger Ale when I fly on airplanes since it helps me not feel so motion sick). You can do it too! Pick something, one thing, and become an even healthier you!

Rice Krispie Treats on the Stovetop

We actually like to call these Celebration Rice Krispie Treats. We made them to celebrate Busy Dad coming home from a work trip, and kids learning how to tie shoe laces. The addition of whole mini marshmallows throughout the treats and colorful sprinkles on top make these extra special.

This is a fun recipe for kids to help with… dumping ingredients, stirring, sprinkling and tasting. What’s not to like?

easy rice krispie treats stovetop

Rice Krispie Treats on the Stovetop

Ingredients:

Instructions:

  1. Line a 13×9 inch glass baking dish with aluminum foil, letting about 2 or 3 inches of foil come off two of the edges (so you can lift everything out easily after the rice krispie treats are cooled and set). Spray the foil with cooking spray.
  2. Melt the butter in a large pot over low heat. Set aside 2 Cups of the marshmallows. Add the rest of the marshmallows (should be about 8-9 cups) to the melted butter. Stir with a sturdy spoon or wooden paddle until the marshmallows are also melted.
  3. Remove from heat, and stir in the salt and vanilla.
  4. Stir in the 12 Cups of rice krispies cereal until they are all coated with the marshmallow/butter mixture. Stir in the remaining 2 Cups of marshmallows.
  5. Dump everything into the foil-lined baking dish. Gently even everything into the dish, but try not to push down hard on the rice krispie treats.
  6. If you’d like to make the rice krispie treats extra fun and special, sprinkle some colorful sprinkles on top. Let cool at room temperature.
  7. To cut the rice krispie treats into pieces, carefully remove everything out of the baking dish by pulling up on the extra foil. Use a knife to cut into pieces. If there are any leftovers, store in an airtight container, with pieces of wax paper or parchment paper between layers.

homemade rice krispy treats

*Inspired by THIS recipe.


Crock Pot Roast with Peperoncinis

Crock Pot Roast is so easy to prepare and only requires a few ingredients. These aren’t ingredients I would normally think to make a roast with, but it turned out super tasty and I loved eating the peperoncinis that were cooked right there with the roast. They weren’t quite as spicy this way 🙂

Slow cooker roast easy

My whole family enjoyed this roast recipe and we hope you will enjoy it too!

Crock Pot Roast

Ingredients:

  • 1 (3-4 pound) beef bottom round roast or chuck roast (I used beef bottom round since it was on sale and wasn’t sure which kind to get anyway, but the lovely lady who shared this recipe with me says she always uses chuck roast and it turns out great that way too!)
  • 1/4 C. butter (I just cut it into a few chunks to place around the roast)
  • 8 peperoncinis, and a splash of the peperoncini juice
  • One packet dry Ranch seasoning
  • One packet dry Au Jus seasoning (you should be able to find this in the grocery store near the taco seasoning mixes)
  • 1 C. water easy crock pot roast seasonings

Instructions:

  1. Turn the crock pot onto the low heat setting.
  2. Add the roast, butter, peperoncinis and a little peperoncini juice.
  3. Whisk together the dry Au Jus seasoning with the cup of water, and pour it over the roast in the crock pot.
  4. Sprinkle the Ranch seasoning on top.  crock pot roast
  5. Cover the crock pot (don’t lock the lid) and cook on low for 8 -9 hours, or until roast is done. (I used a 3 pounder. It was nice and tender by the end of 8 hours.) You should be able to pull it apart easily with a couple of forks.

This crock pot roast goes really well with mashed potatoes. You can even drizzle some of the juices from the crock pot onto the potatoes like a gravy. Serve green peas and/or a fresh salad or fresh veggies on the side.

Easy pot roast dinner in the crock pot

What are some of your favorite easy crock pot recipes?

*Inspired by Kalena

Vegan Banana Muffins with Crumb Topping

These Vegan Banana Muffins are probably the most divine thing you can make with four speckled bananas. Seriously. And the crumb topping is soft, and sort of melts onto the top of the muffin. These would make a great breakfast, snack or even dessert! Although there is sugar and all-purpose flour in this recipe, it’s nice to sort of balance that out with the ground flaxseed, bananas, coconut oil, oats and walnuts.

Vegan crumb topping

Vegan Banana Muffins with Crumb Topping

Ingredients (yields 12 regular-sized muffins):

  • 2 Tbsp. ground flaxseed
  • 5 Tbsp. water
  • 4 medium-sized ripe bananas
  • 1/2 C. brown sugar, packed (I used dark brown sugar)
  • 1/2 tsp. salt
  • 2 tsp. baking soda
  • 1 tsp. vanilla
  • 1/4 C. coconut oil, melted
  • 1 1/2 C. unbleached all-purpose flour
  • 1/2 C. old-fashioned rolled oats
  • 1/4 C. chopped walnuts
  • Crumb Topping:
    • 1/4 C. raw Turbinado sugar
    • 5 Tbsp. all-purpose flour
    • 2 Tbsp. coconut oil (I used soft oil, but not melted.vegan crumb tomming for muffins

Instructions:

  1. Preheat oven to 375 degrees F. and lightly grease a muffin pan. (I usually put the muffin pan on top of a cookie sheet in case of any spills while baking).
  2. In a large mixing bowl, combine ground flaxseed and water. Let rest for 5 minutes.
  3. Mash the bananas into the flax/water mixture.
  4. Stir in brown sugar, salt and baking soda.
  5. Stir in vanilla and melted coconut oil.
  6. Mix in flour, oats and walnuts just until blended.
  7. Put about 1/4 C. batter in each muffin cup, or at least make them all about evenly filled. vegan banana muffins
  8. Wipe out the mixing bowl or grab a smaller bowl for the crumb topping mixture. Just add the raw Turbinado sugar, flour and coconut oil and mix with a fork until crumbly. Sprinkle evenly on top of the muffin batter. banana muffins with crumb topping
  9. Bake in preheated oven for about 20 minutes, or until toothpick comes out clean. Let the muffins rest for about 10 minutes before digging in 🙂 best vegan banana muffins with crumb topping

*Inspired by THIS recipe.

Seasoned Quick Potatoes (“Roasted”)

Seasoned Quick Potatoes would go great with any meal… breakfast, second breakfast, lunch or dinner. We ate these potatoes with breaded chicken strips and green beans. But the thought of having them with a fried egg (with a somewhat runny yolk) just makes my mouth water.

This recipe is great any time of year too! You don’t even need to turn the oven on during the hot Summer months. You’ll just need the microwave and stove top. The crispiness and seasonings of these potatoes are so delicious, perhaps more addictive than french fries 😉 Stovetop roasted potatoes

Seasoned Quick Potatoes (“Roasted”)

Ingredients (serves 4-6):

  • 10-12 small/medium-ish red potatoes, washed
  • 3 Tbsp. butter
  • about 1/2 tsp. dried basil
  • about 1/2 tsp. salt (or to taste)
  • 1/2 tsp. garlic powder
  • 1/2 tsp. onion powder
  • about 1/2 tsp. dried rosemary
  • about 1/4 tsp. pepper (or to taste)

Instructions:

  1. Chop the washed red potatoes into bite-sized cubes. Place in glass microwave-safe bowl (we have THIS set and love them!), and microwave for about 8 minutes (microwaves vary, so you can check them at 5 minutes, and do more minutes depending). The potatoes should be tender enough to pierce with a fork, but not quite falling apart or out of their skins.
  2. Let the potatoes sit a few minutes while you heat a large skillet to medium heat. quick red potato recipe
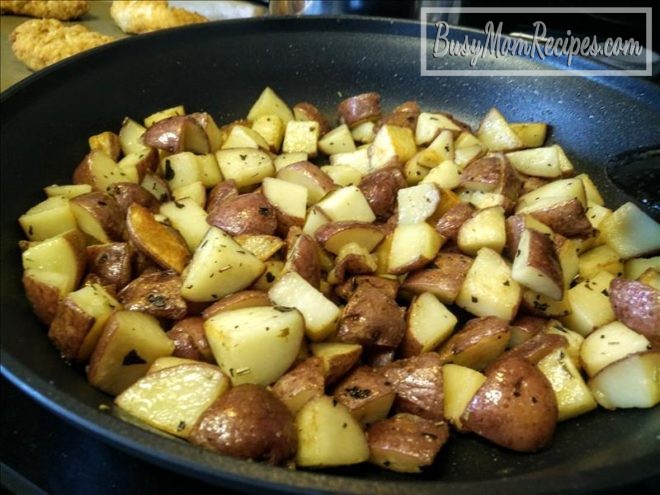
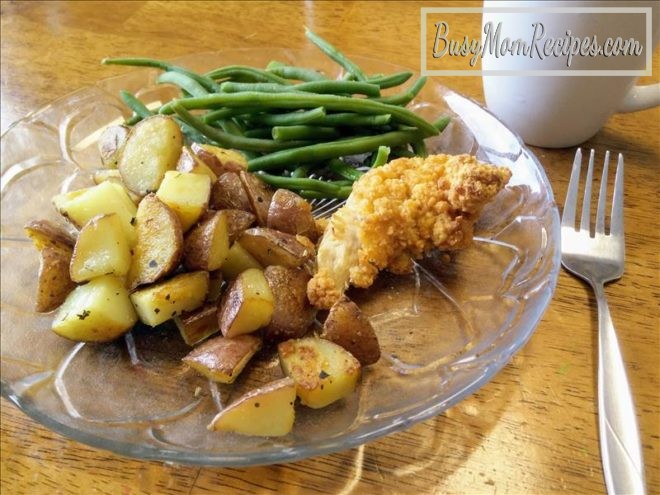
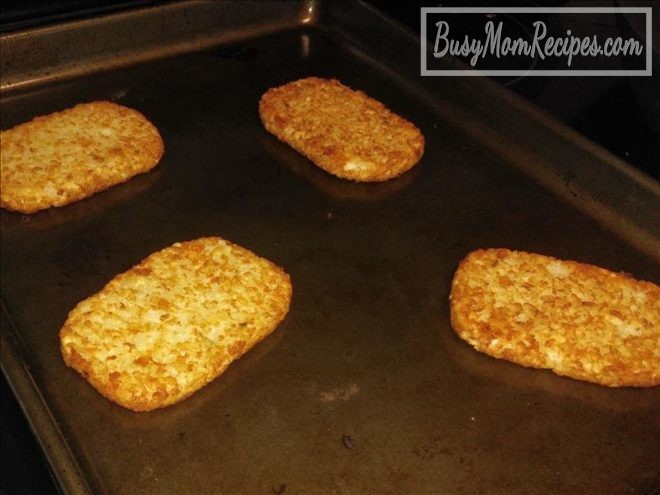
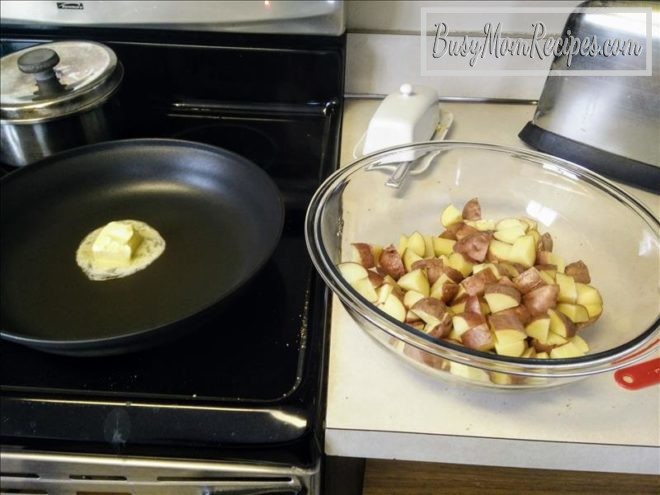
Melt the butter in the skillet,  then add the microwaved potatoes and seasonings. Saute for 8-12 minutes, or until potatoes are cooked through. If you turn the heat to medium-high, it will help the potatoes to get a little more crispy and browned.
    Stir the potatoes around every minute or two.

Serve while the potatoes are still hot and crispy!

Seasoned Quick Potatoes

*Inspired by THIS recipe.

Curried Lentils (Vegan Recipe)

We love eating lentils around here! They are so tasty and nutritious. We often make Healthy Lentil Soup and once decided to make a Curried Lentil Soup recipe. Love both <3  I was looking for a curried lentils recipe that would work well as a side dish, and that could be served on a plate. Found a great one from BudgetBytes. I added a can of coconut milk to make the lentils creamier, and added a half cup more lentils. Vegan recipes

This curried lentils recipe comes together pretty quickly and leftovers still tasted great for the next few days, which might mean a little break from cooking 😉

Curried Lentils (Vegan)

Ingredients:

  • 1 1/2 C. uncooked brownish green lentils
  • 4 C. water
  • 1 Tbsp. light olive oil or avocado oil
  • 2 cloves garlic, minced
  • 1 medium yellow onion, diced
  • 3-4 medium carrots, chopped
  • 2 Tbsp. curry powder
  • 1 (15 oz) can tomato sauce
  • 1 (15 oz) can coconut milk (I like this golden star kind since the ingredients are just coconut milk and water… no extra things like guar gum)
  • 1/2 tsp. salt (or to taste)
  • optional: cilantro

Instructions:

  1. Sort lentils (take out any little rocks). Rinse and drain (I love using a fine mesh strainer since the lentils are just about the size of the holes on my colander). Bring 4 C. of water to a boil in a medium pot, then add the lentils. Stir and bring to a boil. Turn the heat down to low and cover with lid. Simmer for about 20 minutes (while you move on to step 2 below), or until lentils are tender. Gently drain the excess water from the cooked lentils.
  2. Heat a large skillet to medium heat. Swirl the oil in the pan. Add the onions and saute for a couple minutes. Then add the carrots and garlic. Saute until the onions are transparent and the carrots are tender. Add the curry powder and saute about 2 minutes more. Add the cooked lentils and tomato sauce. Stir and heat through for about 5 minutes. healthy recipes curried lentils
  3. Turn off the heat. Add the salt and the can of coconut milk. Stir until the coconut milk is melted in. coconut milk

Top the curried lentils with cilantro if desired. You can eat this on it’s own, or eat it on top of brown rice or whole wheat toast for a delicious and nutritious meal (as you can see below, I served these lentils w/ whole wheat toast, hard boiled eggs and grapes).

Curried lentils vegan recipe

Enjoy!

*Inspired by THIS recipe.

Chewy Ginger Cookies with Molasses (Healthier Style!)

It’s rare for me to deviate from my go-to chocolate chip cookies, but it was time, and these ginger cookies are awesome! Thick, chewy, and probably healthier than your ordinary cookie 🙂

A week or so before Christmas last year, I spent just about all day (and it was even a hot day… not so great for baking) making gingerbread men. I had never made them before and thought, well, why not? Now I can tell you why not 🙂  The best part was the 10 minutes we spent decorating them as a family. That sort of made it worth it. A good rule of thumb might be to make gingerbread men once as a child, and then once as an adult. Gingerbread Men

My kids seemed to have just as much fun rolling these ginger cookie dough balls in the Turbinado sugar as they did decorating those gingerbread men. And the ease of this recipe (not having to roll out the dough several times and use cookie cutters) combined with the unbeatable thickness and chewiness of the cookie makes these ginger cookies the winner recipe in our home 🙂 Easy Ginger Molasses Cookies

Chewy Ginger Cookies with Molasses

Ingredients (yields about 18 cookies):

  • 2 C. whole wheat flour
  • 1/2 tsp. salt
  • 1/2 tsp. baking soda
  • 1 tsp. baking powder
  • 1 tsp. cinnamon
  • 1/2 tsp. ground ginger
  • 1/2 tsp. ground cloves
  • 6 Tbsp. coconut oil, melted
  • 1/2 C. brown sugar
  • 6 Tbsp. molasses
  • 1 egg
  • 3 Tbsp. raw Turbinado sugar in a cereal-sized bowl (to roll the dough balls in before baking)

Instructions:

  1. In a small mixing bowl, stir together the whole wheat flour, salt, baking soda, baking powder, cinnamon, ground ginger and ground cloves. Gingerbread Cookies
  2. In a medium mixing bowl, combine the melted coconut oil (if you have a microwave-safe mixing bowl you can just put the coconut oil in there and heat it up for about 1/2 to 1 minute), brown sugar, molasses and the egg. Stir together. Healthy Ginger Cookies
  3. Add the dry mixture to the wet mixture and stir together until blended together. Place a piece of plastic wrap over the cookie dough and refrigerate it for 1-2 hours. Ginger Cookie Dough
  4. Preheat oven to 350 degrees F. and line a cookie sheet with parchment paper. Roll the dough into about 1 1/2 inch balls, then roll each ball in the raw Turbinado sugar and place 6 dough balls evenly spread out on the parchment-lined cookie sheet. Gently press down on each one with the palm of your hand just a little bit (I forgot to do this for one of our batches, and they still turned out delicious, but the other ones just looked prettier).  Flavorful Molasses Cookies Ginger Cookies with Turbinado SugarMolasses Cookies
  5. Bake in preheated oven for 6-9 minutes. Remove from oven and let sit for 3-5 minutes before transferring to a plate or cooling rack to finish cooling. Ginger Cookies

Sit down, relax, and enjoy a couple ginger cookies 🙂

Thick Chewy Ginger Cookies

*Inspired by THIS recipe.

Coconut Pumpkin Pie (Dairy Free)

This is my third day trying out a dairy free diet. Our mini pumpkin patch in the backyard has been giving us so many lovely pumpkins and we are trying to get some good use out of them 🙂 Today’s dairy free dessert: Coconut Pumpkin Pie with a coconut oil crust.

This pie was quick and easy to throw together. I guess it helped that I already had a ziploc bag with the pumpkin puree ready to use. The crust requires no cutting in butter and no rolling out. Our house smells like Autumn spice and August isn’t even over yet 🙂
dairy free pumpkin pie with coconut milk and cream

Coconut Pumpkin Pie Filling and Crust

Filling Ingredients:

  • 2 large eggs
  • 1/2 C. granulated sugar
  • 1 tsp. vanilla
  • 1/2 tsp. salt
  • 2 1/2 tsp. Pumpkin Pie Spice
  • 2 C. pumpkin puree (or a 15 oz can of pumpkin puree)
  • 1 C. unsweetened vanilla coconut milk
  • 1/4 C. thick coconut cream – not the watery liquid part. Just the thick cream. (use the rest of the thick cream in the can to make a whipped topping for the pie… see below! And save the liquid to add to smoothies later)
    eating dairy free with coconut milk and cream
    So 1 C. of the coconut milk in the purple container plus 1/4 C. of the thick cream in the brown can. There will also be liquid in the coconut cream can. Just save that for smoothies later.

    coconut cream
    Separate the thick coconut cream from the liquid.

Crust Ingredients:

  • 1 1/2 C. plus 2 Tbsp. all-purpose flour
  • 2 tsp. granulated sugar
  • 1/2 or 3/4 tsp. salt (I used 3/4 and it was fine, but I might reduce to 1/2 next time)
  • 2 Tbsp. unsweetened vanilla coconut milk
  • 1/2 C. melted coconut oil

Whipped Coconut Cream Topping:

Whip together the leftover thick coconut cream (not the liquid) with 1/2 C. powdered sugar and 1/2 tsp. vanilla until smooth. Serve immediately over pie, or refrigerate until ready to use (it might harden in the refrigerator, so just take it out a few minutes before serving so it can soften a bit). dairy free coconut cream from Trader Joes

Instructions:

  1. Preheat oven to 425 degrees F. Put a 9 1/2 inch glass pie plate on top of a rimmed cookie sheet and set aside.
  2. In a medium/large mixing bowl, beat together all of the filling ingredients with an electric mixer. Set aside. dairy free pumpkin pie filling
  3. For the crust, stir together using a fork, the flour, sugar and salt right there in the glass pie dish. Add the coconut milk and melted coconut oil. Stir together with fork until it forms a dough. Use your fingers to gently press the dough evenly onto the bottom and sides of the pie dish. dairy free pie crusthow to make dairy free pie crustdairy free pie crust with coconut oil
  4. Pour the filling into the crust and bake in the oven at 425 degrees F for 20 minutes. Then, reduce the heat to 350 degrees F. and bake for one hour more. Remove from oven and let cool to room temperature. Then refrigerate overnight. dairy free pumpkin pie and crust recipepumpkin pie with coconut milk
  5. Serve coconut pumpkin pie topped with Whipped Coconut Cream Topping if desired. dairy free coconut pumpkin pie

*Inspired by THIS recipe and THIS recipe.

Eating Dairy Free for Two Weeks -Day 3

It has been fun eating dairy free for the last few days. I’ve tried a few new things, and have also eaten things I would normally eat anyway, just not topped with cheese 🙂

My kids are also trying new things. One of the reasons I’m eating dairy free at this time is because my kids aren’t crazy about dairy right now. So I don’t feel a need to make a regular meal along with my own dairy-free version of that meal.

Eating Dairy Free for Two Weeks- Day 3

Breakfast: Hashbrown patty (from Trader Joe’s) topped with an over easy egg, with a smoothie on the side. The smoothie was made with unsweetened vanilla coconut milk, frozen mixed berries, frozen pineapple, frozen spinach and a banana.  hashbrown patties in the ovenover easy eggsdairy free breakfast ideadairy free smoothie

Morning Snack: a clementine

Lunch: Peanut butter and jam sandwich on quinoa bread, with sugar snap peas and carrots and a drink of sweetened vanilla almond milk (which I used to dip my sandwiches in) dairy free lunch

Afternoon Snack: a few Triscuit crackers

Dinner: pasta topped with sauteed baby portabello mushrooms, marinara sauce, and a good drizzle of extra virgin olive oil (mushrooms sauteed in coconut oil). Grapes on the side. eating dairy free dinner pasta and sauce

Dessert: Dairy Free Coconut Pumpkin Pie. Yum! dairy free coconut pumpkin pie