Dairy Free Meals Day 2

Today was filled with more simple dairy free meals, mostly made with leftovers. I was surprised that the wrap I had for lunch was actually very tasty. I almost made a second one just because it was so yummy!

Dairy Free Meals Day 2

Breakfast: steel cut oats with some brown sugar, walnuts, ground flaxseed, raisins and vanilla almond milk with a clementine on the side. dairy free meals oatmeal add-inssteel cut oatmeal dairy free meals

Morning Snack: Celery topped with almond butter and a few unsweetened unsulfered dried Bing cherries dairy free snack celery and almond butter

Lunch: A tortilla wrap with hummus, ham, kale and purple onion. Salt and pepper sprinkled inside too. And I microwaved the tortilla for about 10 -15 seconds first, to make it less likely to break when rolled up. A clementine on the side (we bought a huge bag of really yummy seedless clementines yesterday). wrap ingredientsdairy free meals tortilla wrapdairy free lunch

Dinner: Quinoa (cooked in water) topped with some extra virgin olive oil, salt, and pepper. Steamed broccoli and rotisserie chicken with some barbecue sauce. dairy free dinner quinoa chicken broccoli

Also, I made a dairy free pumpkin pie and crust tonight. We picked in it to make sure it tastes good, and it tastes great! Will post the recipe tomorrow along with my Dairy Free Day 3 post.

Dairy Free Eating Day 1

Even though many people seem to be eating dairy free, gluten free, sugar free or meat free nowadays, I have been slow to experiment with these diets.But I am now at a point where I rarely use cow’s milk anymore (mostly just use for baking, which is easy to substitute). Yogurt is also not as yummy to me as it used to be. I love ice cream, but we have gone for long stretches without much of it. Cheese, butter and heavy whipping cream are what I will miss the most. But honestly, I’m really excited to try out this dairy free thing 😀 I’ll try to post everyday for the next two weeks. Hopefully these ideas will be  especially helpful to any of you who are trying to eat dairy free.

Eggs are probably considered dairy, but I am still going to eat them for this experiment, just so ya know 🙂

Dairy Free Eating Day 1

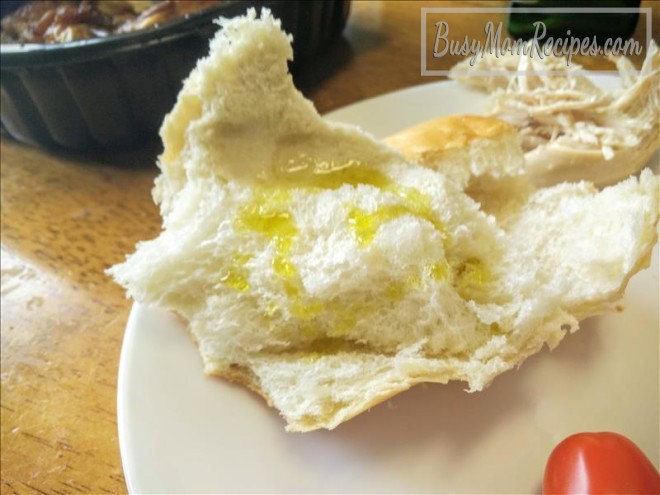
Breakfast: plain toast (without whey or other milk products) topped with sunny-side up egg (cooked in a bit of coconut oil)

Morning Snack: clementine and a Trader Joe’s Cereal Bar (which DID have milk in the ingredients list. I should have read it before eating)

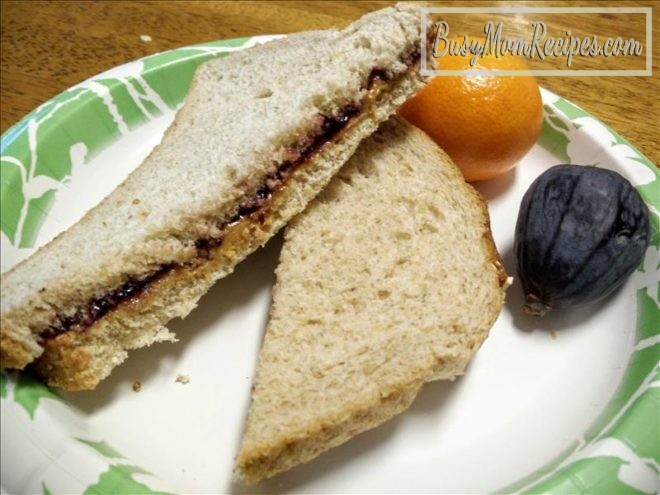
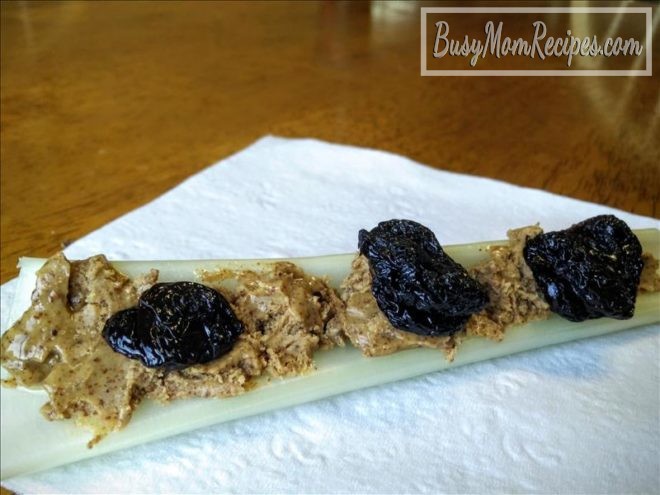
Lunch: clementine, fig (my first time trying a fresh fig and it was pretty good! My kids loved them too!), Saltine crackers topped with salami and fresh basil, Triscuit crackers and some leftover PB&J (my kids also happened to have a dairy free lunch: peanut butter and jam sandwich made with quinoa bread, fig and clementine, and some of my salami and crackers)Salami and Crackerspeanut butter and jelly on quinoa bread

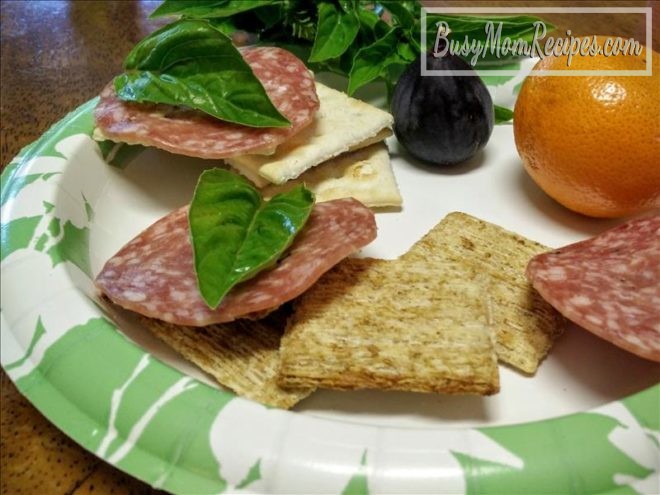
Afternoon Snack: I was getting some work done at Starbucks and ordered a hot chocolate made with coconut milk and without the usual whipped cream. Also had an everything bagel (without butter or cream cheese) I felt quite pampered there, with the worker accommodating my dairy free diet 🙂

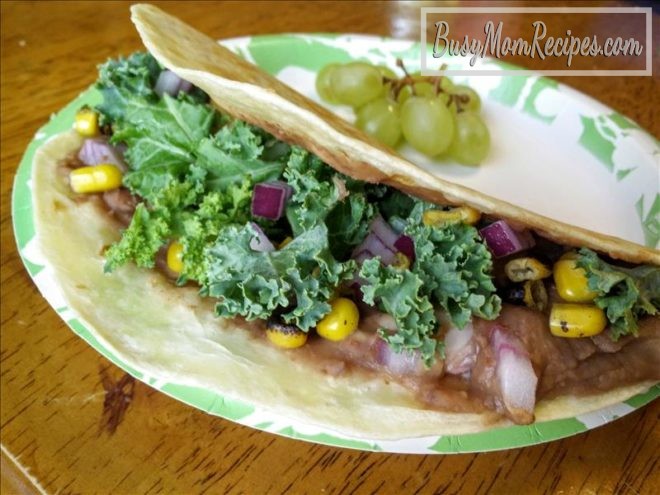
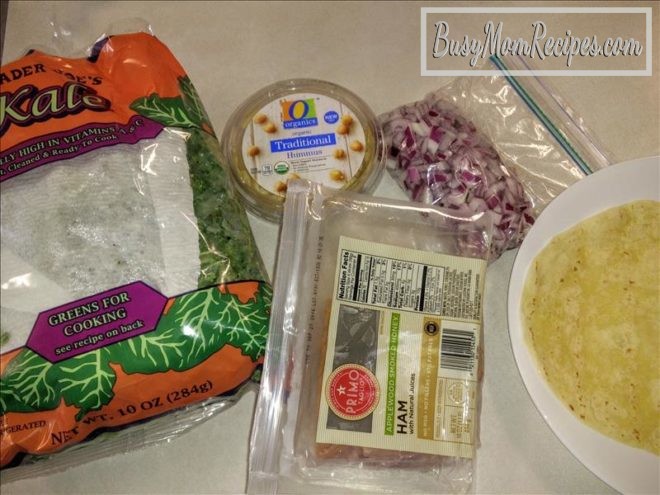
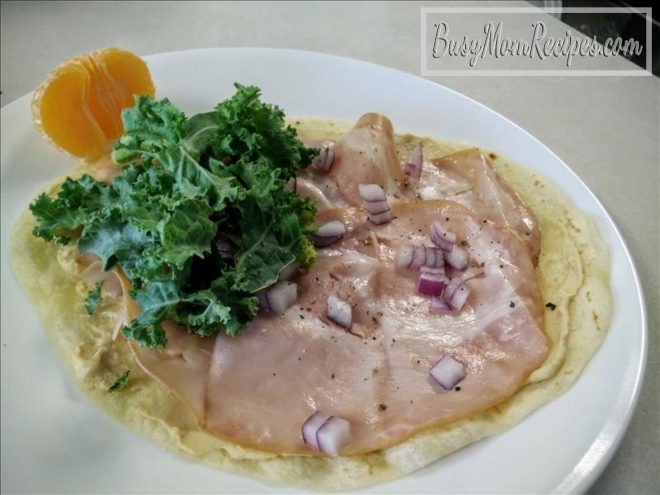
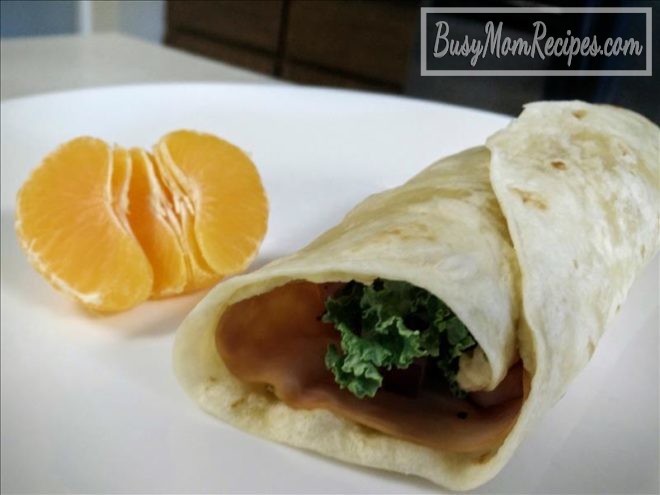
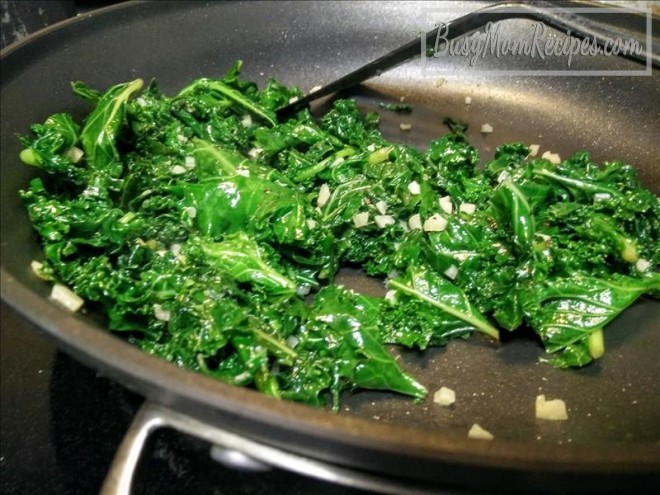
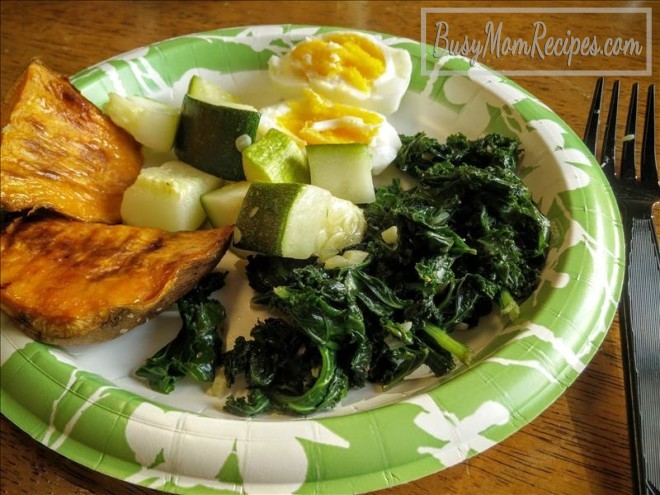
Dinner: Burrito made with flour tortilla, fat free refried beans, fresh kale, fire-roasted corn, chopped purple onion and a squeeze of fresh lime juice. Grapes on the side. dairy free burritodairy free bean burrito

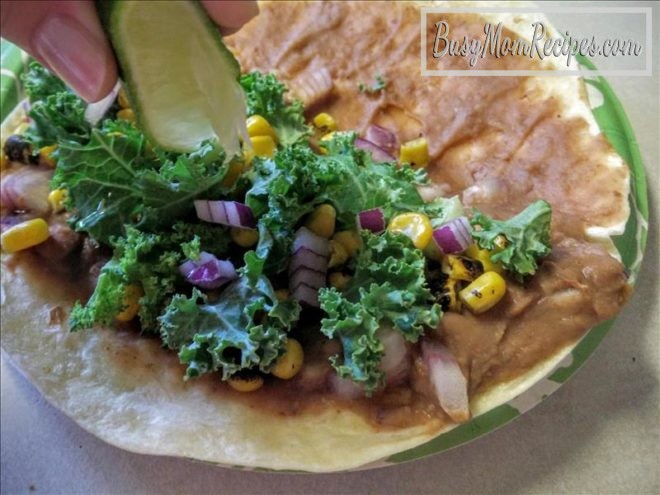
Late Night Treat: An organic OCHO peppermintorganic ocho peppermint dairy free

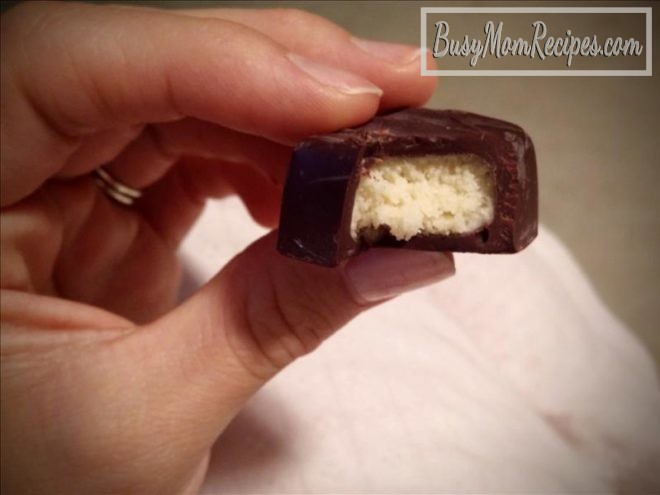
All in all, it was a good first (almost) dairy free day. We had a busy day, so didn’t make the meal prep too involved. Also, it’s Summer! So these were great meals that didn’t require the oven or boiling anything for hours on the stove.

Stay tuned for tomorrow’s dairy free meal ideas!

Also, do you have any favorite dairy free meals, snacks, or desserts? If so, please share in the comments!

Thanks 😀

*Disclaimer: I am not a professional doctor or nutritionist. These are just dairy free meal ideas that you’re welcome to add into your own meal plan if you so desire. You may have already noticed, but today’s meals were a little heavy on the carb/wheat side and a little light on veggies… probably not a perfectly nutritious, well-rounded meal plan.


Flourless Chocolate Cake (made with quinoa)

Did you see the post a few weeks ago for Quinoa Tabbouleh? Well, here is another delicious quinoa recipe I am excited to share! In this recipe, you can’t really taste the quinoa though 🙂 This flourless chocolate cake is moist and I think it has a great texture. The whipping cream frosting is light and not too sweet. It goes really well with the cake.

It’s amazing that this cake tastes so much like a chocolate cake made with flour even though it’s made with cooked quinoa. Give this recipe a try and please let us know what you think! Gluten Free Chocolate Cake

Flourless Chocolate Cake (made with quinoa)

Ingredients (for a circular 9-inch cake):

  • 1/3 C. almond milk (you can use another milk of choice if you want)
  • 4 large eggs
  • 2 C. quinoa, cooked and cooled (rinse 1 Cup raw quinoa in a fine-mesh strainer under cool water. Put the rinsed quinoa in a saucepan with 2 Cups of water. Bring to a boil. Once boiling, cover and reduce heat to a simmer. Let simmer 12-15 minutes, or until tender and water is absorbed. Let cool.)
  • 1 tsp. vanilla
  • 1/2 C. butter, unsalted (if you use salted butter, just adjust the salt content by reducing the 1/2 tsp. salt to 1/4 tsp. salt)
  • 1 1/2 tsp. baking powder
  • 1/2 tsp. baking soda
  • 1/2 tsp. salt (or 1/4 tsp. if you used salted butter)
  • 1/2 C. plus 2 Tbsp. cocoa powder, separated
  • 1 C. granulated sugar
  • 1 C. heavy whipping cream
  • 2 Tbsp. powdered sugar
  • optional: mint leaves as a garnish

Instructions:

  1. Preheat oven to 350 degrees F. Line a 9-inch circular cake pan with a circle of parchment paper, then lightly spray the pan with cooking spray. Round Cake Pan
  2. Add almond milk, eggs, cooked and cooled quinoa, vanilla, and butter to a food processor or a good blender. Blend until smooth. Add baking powder, baking soda, salt, the 1/2 C. of cocoa powder and 1 C. of granulated sugar. Blend until mixed. If you’re using a struggling blender, then just mix in the dry ingredients by hand in a bowl with the smooth quinoa mixture. Flourless Cake
  3. Pour mixture into parchment-lined cake pan. Bake in preheated oven for 40-42 minutes. Remove from oven and let cool completely before frosting (if I let it cool overnight, I usually cover it lightly with a clean dish towel). Flourless Chocolate Cake made with QuinoaGluten free cake
  4. Before serving, make the frosting by whipping the heavy cream until stiff peaks form (but don’t turn it into butter!). Before it gets too stiff, add the 2 Tbsp. of cocoa powder and 2 Tbsp. of powdered sugar. Mix together. Remove cake from pan by tipping it upside down onto a plate. You may have to tap it a couple times to get the cake out. Peel off the parchment paper and discard. Spread the frosting on the cake. Refrigerate, covered loosely with foil, until ready to serve.

Garnish with mint leaves if desired 🙂

Quinoa Chocolate Cake with Whipped Cream Frosting

*Inspired by THIS recipe.

How to Cook Kale (A stove-top Recipe)

Have you ever wondered how to cook kale? There are probably many techniques, but here is a very quick and simple recipe that I love, and hope you will also enjoy! Kale makes quite a tasty, healthy side dish 🙂

How to Cook Kale (A Stove-top Recipe)

Ingredients (about 4 servings):

  • 2 Tbsp. light or extra light olive oil
  • 4-5 cloves garlic, minced (I used 4 large cloves)
  • ready-to-cook kale (about 6 big handfuls)
  • salt and pepper to taste (I didn’t use coarse salt and pepper just because I didn’t want the kale to be gritty)

Instructions:

  1. Make sure the kale is clean. If you didn’t buy it from a ready-to-cook bag, you will probably need to soak it in some water and rinse off all the dirt. I rinsed my ready-to-cook kale anyway, and picked through it and pulled out any loose stems and yucky looking leaves. If the kale leaves aren’t already torn, just tear them up a bit into smaller pieces (but not too small). cook kale
  2. Heat a large skillet to medium-high heat. Add the olive oil and swirl to coat the bottom of the pan. Add the minced garlic and mix with a spatula or something that won’t scrape the pan (keep mixing so the garlic doesn’t burn). After about 30 seconds, add the kale and keep mixing for another 2-4 minutes. saute kale with garlic
  3. Remove from heat and add salt and pepper to taste (start with a small amount and add a little more if needed). sauteed kale
  4. Serve immediately with a delicious meal (like the one below!).

    Healthy Dinner with Cooked Kale
    Cooked Kale with baked sweet potatoes, zucchini sauteed in coconut oil, and hard boiled egg

*Inspired by THIS recipe.

Double Chocolate Zucchini Bread

This is a healthier version of chocolate zucchini bread (uses half whole wheat flour, not as much sugar as some other recipes, lots of zucchini and some Greek yogurt for extra protein and moisture). BUT… it tastes like a very moist chocolate cake. My kind of snack 🙂

This recipe makes 2 (9×5 inch) loaves, but if you just want one loaf, halve the recipe. But trust me, it disappears quickly so you’ll probably want to make two loaves!

chocolate zucchini bread recipe

Double Chocolate Zucchini Bread

Ingredients (makes 2 (9×5 inch) loaves):

  • 1 C. whole wheat flour
  • 1 C. all-purpose flour
  • 1 C. unsweetened cocoa powder (I used more like 3/4 C and it was still enough)
  • 1 1/2 tsp. baking soda
  • 1/2 tsp. baking powder
  • 1/2 tsp. salt
  • 1 1/2 C. semi-sweet chocolate chips
  • 3 C. grated zucchini (washed and with peels on)
  • 4 eggs
  • 1/2 C. Canola oil
  • 1/2 C. plain or vanilla Greek yogurt
  • 1 C. granulated sugar
  • 2 tsp. vanilla extract

Instructions:

  1. Place two 9×5 inch loaf pans on a cookie sheet. Lightly spray each loaf pan with cooking spray. Set aside. Preheat oven to 350 degrees F.
  2. In a large mixing bowl, whisk together whole wheat flour, all-purpose flour, cocoa powder, baking soda, baking powder, salt and chocolate chips.
  3. Grate the zucchini and place on paper towels or a clean dish towel. Gently press the paper towel or dish towel on top of the zucchini to help get out some of the liquid. Not all of the liquid, just some. Set aside.
  4. In a medium mixing bowl, whisk together eggs, oil, Greek yogurt, sugar and vanilla.
  5. Whisk the wet mixture into the bowl with the dry mixture until moistened. With a spoon, fold in the zucchini. Pour into bread pans evenly. Bake in preheated oven for about 45 minutes, or until toothpick comes out clean, with a few moist crumbs (45 minutes worked perfectly for us).
  6. Let bread cool about 10 minutes. Gently get the loaves out of the bread pans and onto a plate or cutting board or other flat surface. Let cool, then slice and serve.

Goes great with a cold glass of milk!

*Inspired by THIS recipe.

Quinoa Tabbouleh

This tabbouleh recipe is vegan. Gluten-free. Nutritious.

The first time I can remember eating tabbouleh is in college, when my mom stopped by and brought me a container of it. It was so fresh. So colorful. So flavorful. Almost the complete opposite of my college student diet.

Are you enjoying the Summer heat? Tabbouleh is a perfect summertime salad. If you want a light lunch or dinner, have a bowl of tabbouleh. If you need a side dish to a meaty barbecue, serve tabbouleh. If you garden, you might even have some of the ingredients growing in your garden! I used our home-grown parsley in this recipe and some mint from a friend 🙂

*I suggest cooking and cooling the quinoa in advance (see instruction #1). And if you want to cook some extra quinoa while you’re at it, you could make a Flourless Quinoa Chocolate Cake too!

summer salad quinoa tabbouleh

Quinoa Tabbouleh Recipe

Ingredients:

  • 1 C. uncooked dry quinoa
  • 2 C. water
  • 1 C. curly parsley, chopped
  • 1/2 C. mint leaves, chopped
  • 2 small cucumbers, chopped
  • 1 C. cherry tomatoes, halved
  • 1/2 C. finely chopped red onion
  • 2-3 Tbsp. lemon juice (juice from 1/2 or 1 lemon)
  • 1/4 C. extra virgin olive oil
  • 1/2 tsp. salt
  • optional: fresh ground black pepper, to taste

Instructions:

  1. Rinse and drain quinoa in a fine-mesh strainer.  how to cook quinoa
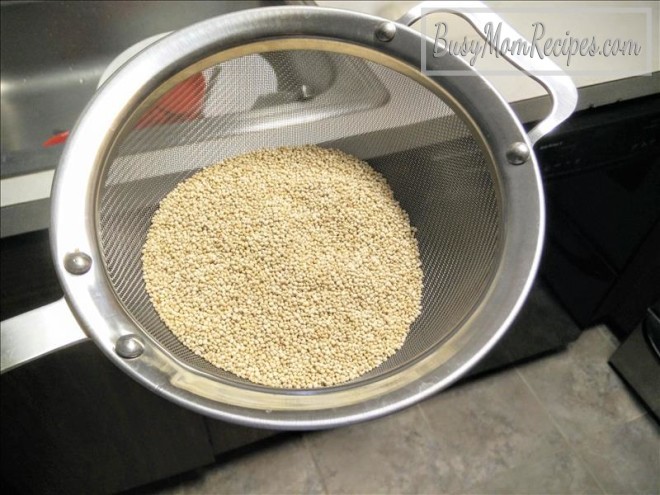
Put the quinoa into a medium saucepan with the 2 cups of water. Bring to a boil. Once boiling, cover and reduce heat to medium low. Let simmer for about 10-15 minutes, or until quinoa is tender and water is absorbed.  Remove from heat, fluff with a fork, and let cool to room temperature, then stick it in the refrigerator to cool until you’re ready to make the quinoa salad. cooked quinoa
  2. In a medium mixing bowl (I just bought this set of glass mixing bowls with lids… the 2.5 quart bowl is great for this recipe!), add the cooked and cooled quinoa, parsley, mint, cucumbers, tomatoes and red onion. Mix with a spoon. Drizzle the lemon juice and olive oil on top. Then add the salt (and a little pepper if desired). Give it another mix with a spoon. gluten free dairy free tabbouleh
  3. Serve immediately or cover and refrigerate until ready to serve (if you wait to serve, you may want to mix in a little extra olive oil right before serving). tabbouleh quinoa salad

*Inspired by THIS recipe.

Orange Julius with Only Two Ingredients

There are several Orange Julius recipes out there with a good list of ingredients. Usually ice, milk, sugar, vanilla extract, orange juice concentrate, etc. That could be great for when you might not have ice cream in your freezer. But if you have vanilla ice cream in your freezer, this recipe comes together so fast and is delicious! It’s the perfect treat for a Summer day.
how to use up oranges


Of course, if you want to make it a little fancier, put a little whipped cream or sprinkle some orange zest on top. You can sip it with a straw, serve it with spoons, or just drink it from the glass.

Orange Julius Recipe

Ingredients (serves 2-4):

  • 1 C. (or 1 1/4 C) orange juice (Start with 1 cup and add more if needed in the blender– I squeezed 5 small oranges and got about 1 1/4 C.)
  • 2 C. Vanilla Bean Ice Cream vanilla bean ice cream ice cream

Instructions:

Pour orange juice into blender. Add the vanilla bean ice cream. Blend together until smooth (you can add a little more orange juice if it makes it easier to blend).

two ingredient orange julius

And that’s it! Just pour into glasses and enjoy the yumminess 🙂

Orange Julius

*Inspired by THIS recipe.

Pancit Canton Noodles

So I think my favorite main dishes are these Pancit Canton noodles, pizza and burritos. Not all together of course, but if they are made right, they sure taste great and I don’t think I can ever get tired of them :

You can cook the chicken and vegetables the day before or morning of and refrigerate them to make this recipe come together really fast when you’re ready to eat it. Also, if you want to substitute the chicken with scrambled eggs, I think that would be delicious too!

summer stove top pancit canton noodles

Pancit Canton Noodles Recipe

Ingredients (4-6 servings):

  • 1 package dry pancit canton noodles
  • 2-3 chicken breast fillets, cooked and sliced (I recommend this PAN SEARED CHICKEN BREAST FILLETS recipe- so delicious!)
  • light olive oil (about 2 Tbsp., split)
  • about 1 Tbsp. fresh ginger, minced
  • 2 cloves garlic, minced
  • 2 carrots, sliced thin
  • 2 stalks celery, chopped
  • 2 small/medium heads of broccoli, chopped into florets or half florets
  • kosher salt for taste
  • about 1-2 tsp. low-sodium soy sauce
  • some water

Instructions:

  1. Cook the chicken breast fillets (use THIS easy recipe). Once cooked, slice them up. Cover and refrigerate if you’re not planning on making the rest of the Pancit Canton right away.
  2. Cook the vegetables: Heat a large pan (that has a lid) to medium heat. Add about 1 Tbsp. olive oil, or enough to generously coat the bottom of the pan. Swirl around gently. First cook the minced ginger and garlic in the oil for a minute, stirring frequently. Add the carrots and cook another 2 minutes or so, stirring frequently. Add the celery and broccoli florets. Cook and stir for another 2-3 minutes. Add a little water (about 1-2 Tbsp.), cover with lid and let cook about 10 minutes, sitting once after 5 minutes. When the veggies are tender, but before they are mushy, remove from heat. If not using right away, cover and refrigerate until ready to use.
  3. Cook the noodles: Find a large pot and fill it about 2 inches with water. Bring water to a boil. Add the dry Pancit Canton noodles and stir for about 3 minutes, or until the noodles are no longer crunchy. Don’t overcook, you don’t want them too mushy! Drain out the water. Stir in about a tablespoon of olive oil and a sprinkle of kosher salt (or table salt), and a little soy sauce to taste. Add in the cooked chicken slices and veggies. Mix together and serve. If the chicken and veggies have been refrigerated, you can reheat before adding them to the noodles, or just stir them into the hot noodles over a low heat setting, adding a little more olive oil if necessary, until the chicken and veggies are warm/hot throughout. pancit canton recipe with chicken

You can serve this Pancit Canton with a side of fresh fruit.

dry pancit canton filipino noodles

*Inspired by this CHOW MEIN recipe and this ASIAN NOODLES RECIPE TIPS page.


Pan Seared Chicken Breast Fillets

This pan seared chicken is flavorful and moist!  Comes together in about 20 minutes. You can use chicken breast, but I personally like cooking with chicken breast fillets because they are thinner (quicker to cook and easier to eat).

best chicken breast fillet recipe 
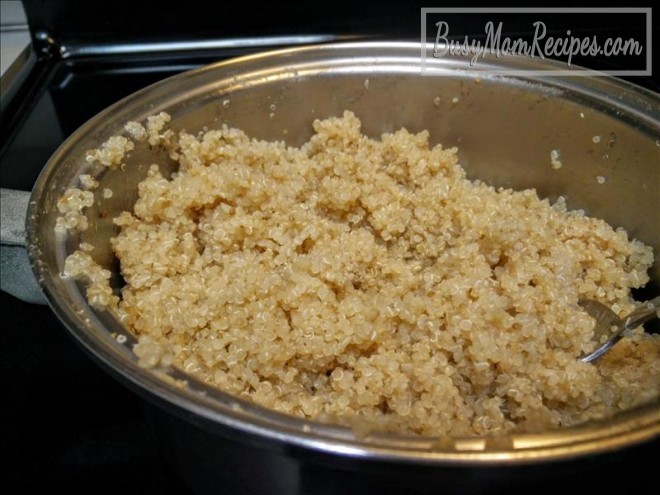
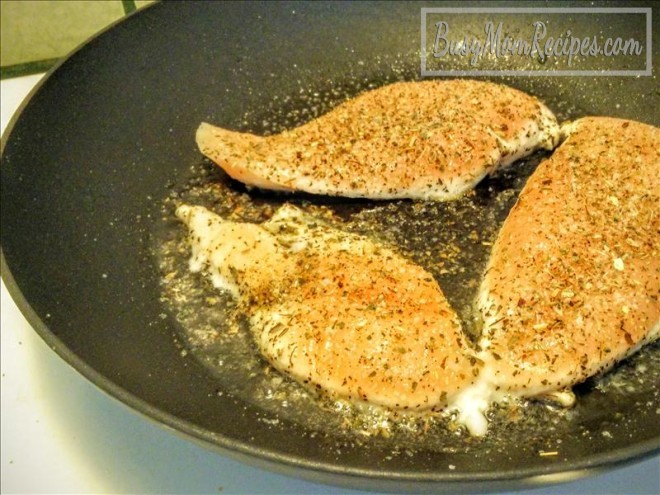
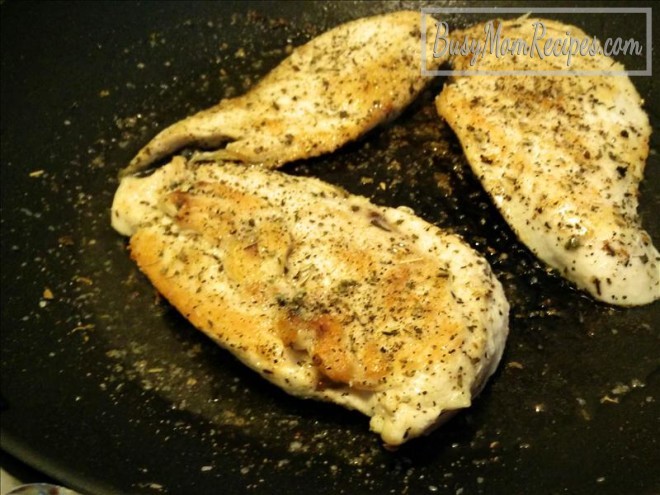
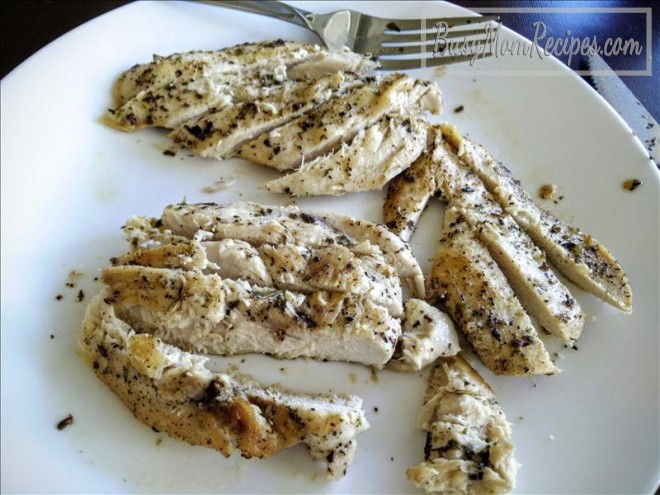
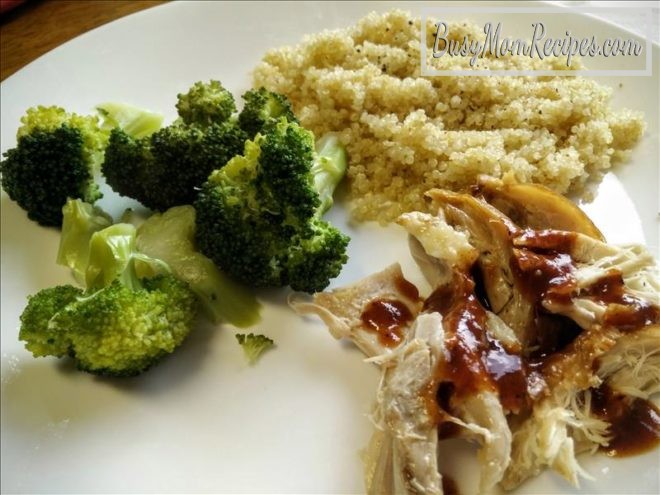
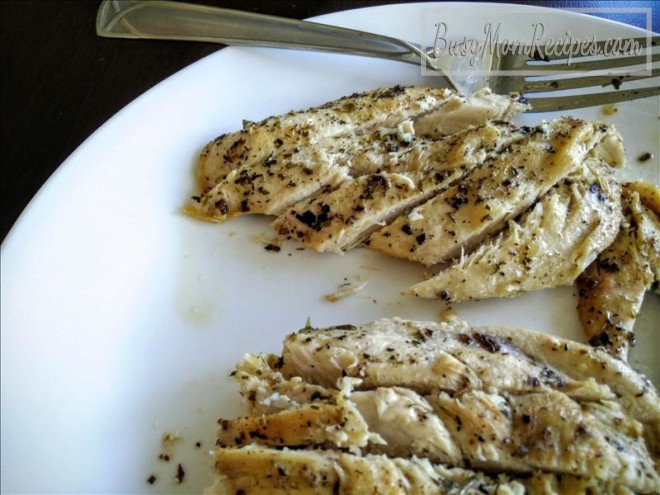
Pan Seared Chicken Breast Fillets Recipe

Ingredients:

  • 3 chicken breast fillets (if you use chicken breast, you may have to cook them a little longer since they are thicker than fillets)
  • olive oil
  • kosher salt and/or regular table salt
  • ground black pepper
  • Herbes de Provence seasoning (or other poultry seasoning of choice)

Instructions:

  1. Heat a pan to medium-high heat. Add about a tablespoon of light olive oil, or enough to coat the bottom of the pan generously.
  2. Gently set each chicken breast fillet into the pan. Sprinkle each generously with salt, pepper, and Herbes de Provence (or other poultry seasoning). Cook without moving the fillets for about 2-3 minutes, or until bottoms are browned. how to sear chicken
  3. Flip each fillet over and sprinkle each again with salt, pepper, and poultry seasoning. Let cook 2-3 minutes. Put about a tsp. of water into a lid, then put the lid on top of the chicken. Turn heat to low and set a timer for 12 minutes. Do not lift up the lid during these 12 minutes! sear and cook chicken in a pan
  4. When your timer rings, lift the lid and use a sharp knife (carefully) to slice through the thickest parts of the chicken. If there is any pink, replace the lid and cook another 5 minutes or so. Repeat if necessary until there is no more pink meat. When there is no pink, transfer the chicken onto a plate. Slice or cube as desired.

pan seared chicken

This chicken is amazing on it’s own, but would be great tossed in a salad! We nibbled on some of it then threw the rest into PANCIT CANTON NOODLES (will post recipe next week, so be on the lookout!).

dry pancit canton filipino noodles

*Inspired by Olivia, who was inspired by Maple.

French Bread with Olive Oil

I received Ari Weinzweig’s book, Zingerman’s Guide to Good Eating: How to Choose the Best Breads, Cheeses, Olive Oil, Pasta, Chocolate and Much More as a Mother’s Day gift from my thoughtful husband. Having only read the first bit of it, I just couldn’t wait to buy some French bread to top with a drizzle of olive oil!

French Bread

Do you have a favorite type of olive oil you like to use? I’ve never splurged on a really fancy kind. We currently have California Olive Ranch Extra Virgin Olive Oil and I like it pretty well.

Weinzweig recommends using warm French bread. I microwaved a piece for 10-15 seconds before drizzling olive oil on top. It was delicious, and I felt fancy 🙂 The room temperature bread was fine, but when we used warm bread, it brought out more of a peppery taste in the olive oil.

side dish

This is a great side to eat with spaghetti!

Testing new hosting, hi!